Overview
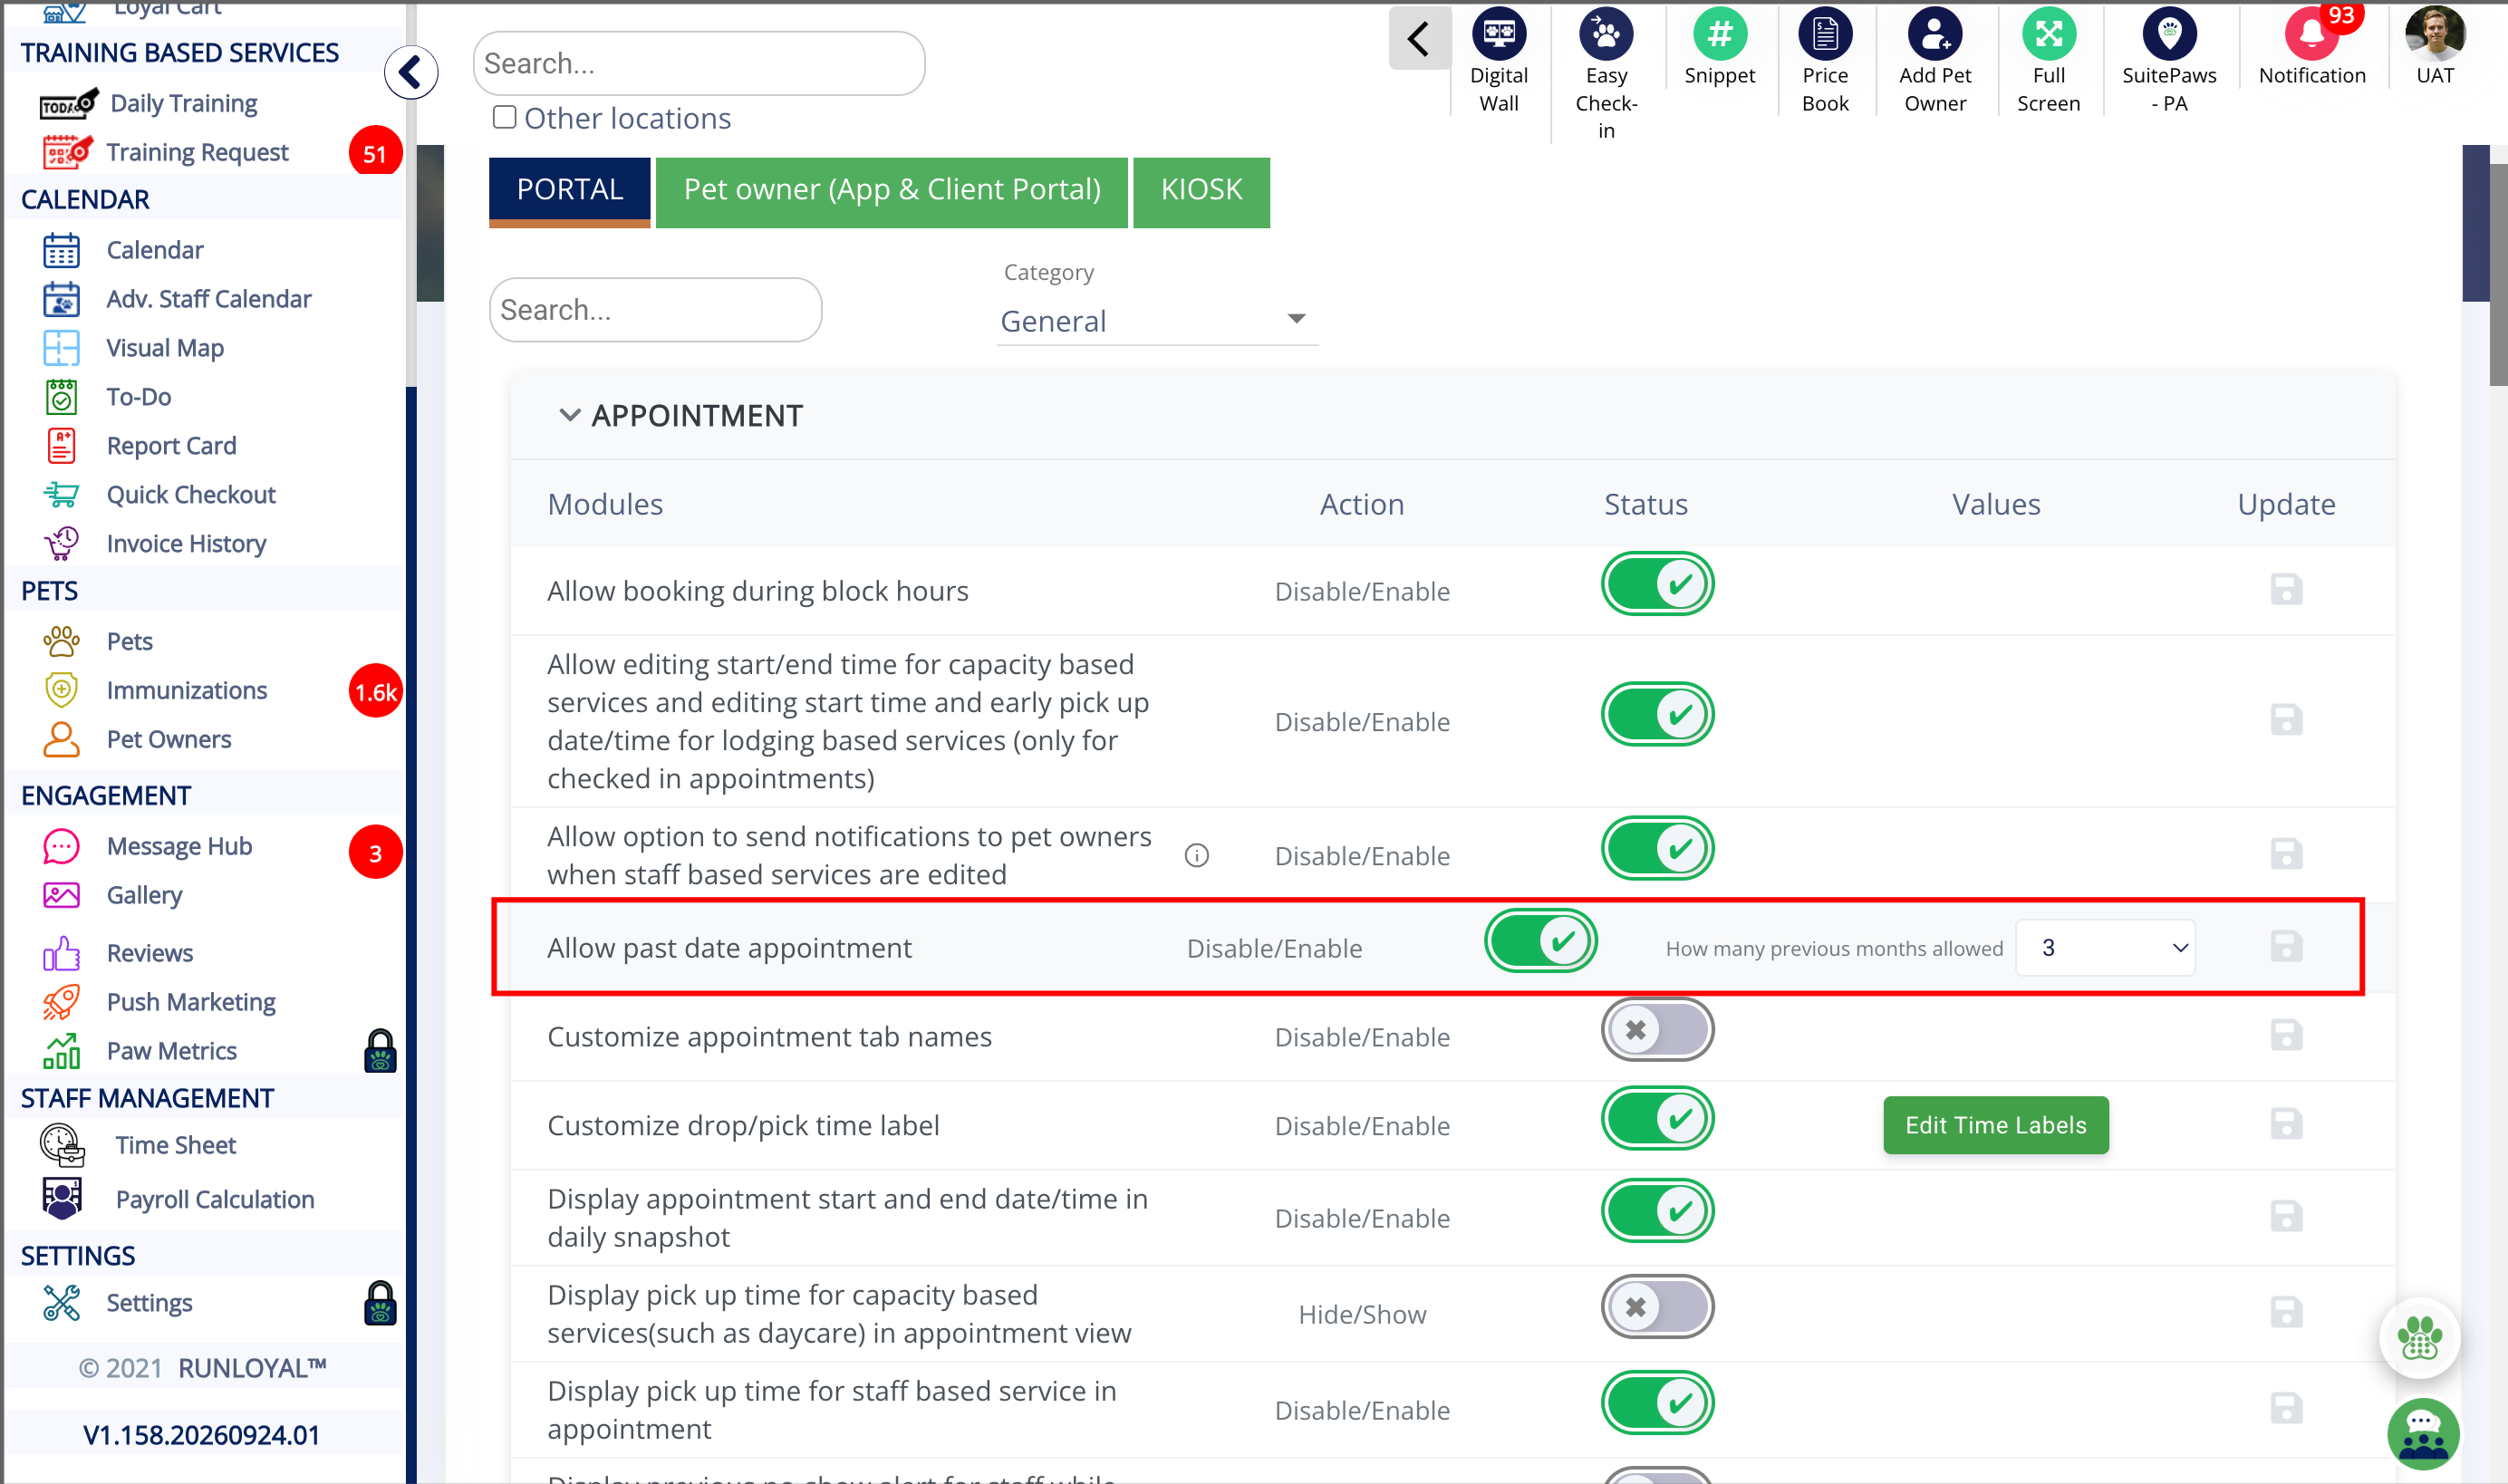
Past Appointment Booking allows staff to create appointments for dates that have already passed. Businesses can enable this feature and define a look back window of 1–6 months, allowing teams to accurately record appointments that were missed or entered after the actual visit.
This is useful for recording walk-ins, phone bookings, or appointments entered after the service occurred helping businesses maintain complete and accurate appointment records without relying on manual workarounds.
TABLE OF CONTENTS
Applicable Users
- Business Owner / Kennel Owner
- General Manager / Location Manager
- Front Desk / Receptionist
Requirements
Before using Allow Past-Date Appointment Booking, ensure you:
- Have access to the RunLoyal Business Portal.
- Have permission to access Settings → Operations → Personalization.
- Have permission to create appointments.
- Have Allow Past Date Appointments enabled.
- Have configured a lookback window between 1 and 6 months.
- Have an existing pet owner and pet available for the appointment.
- Have the required service configured and available for booking.
- Know the actual past appointment date and required appointment details.
Basic Step
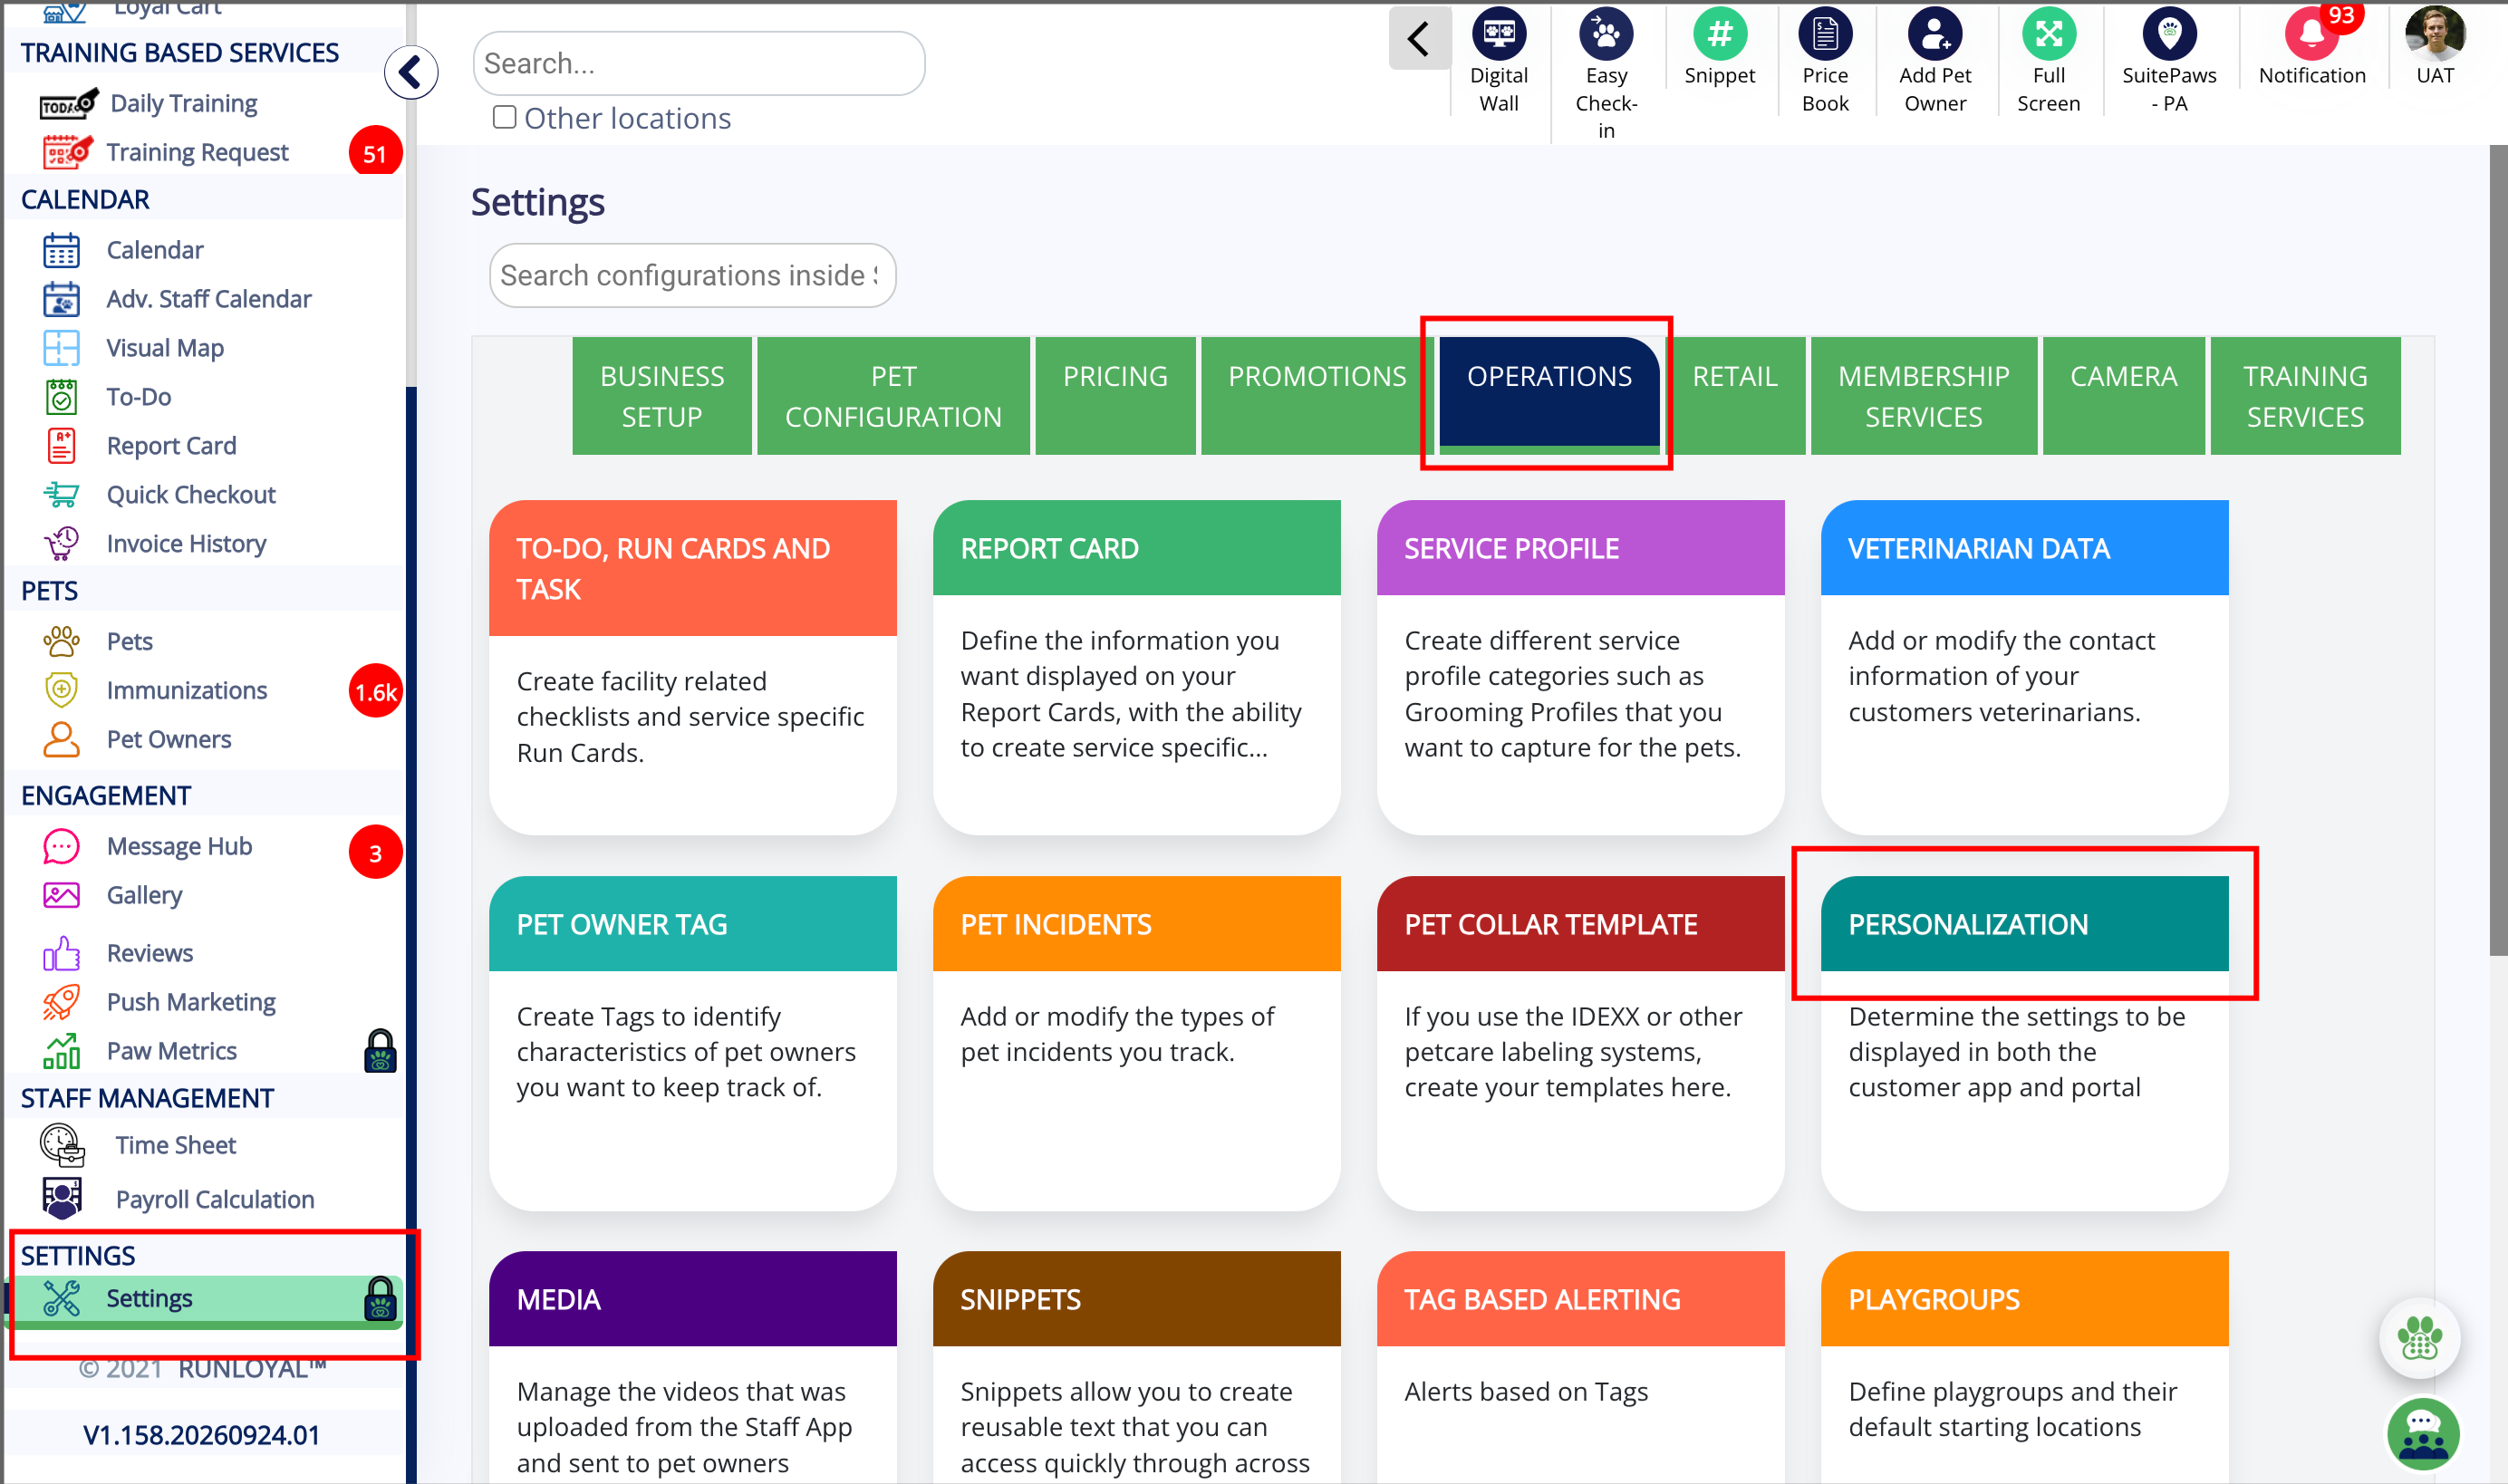
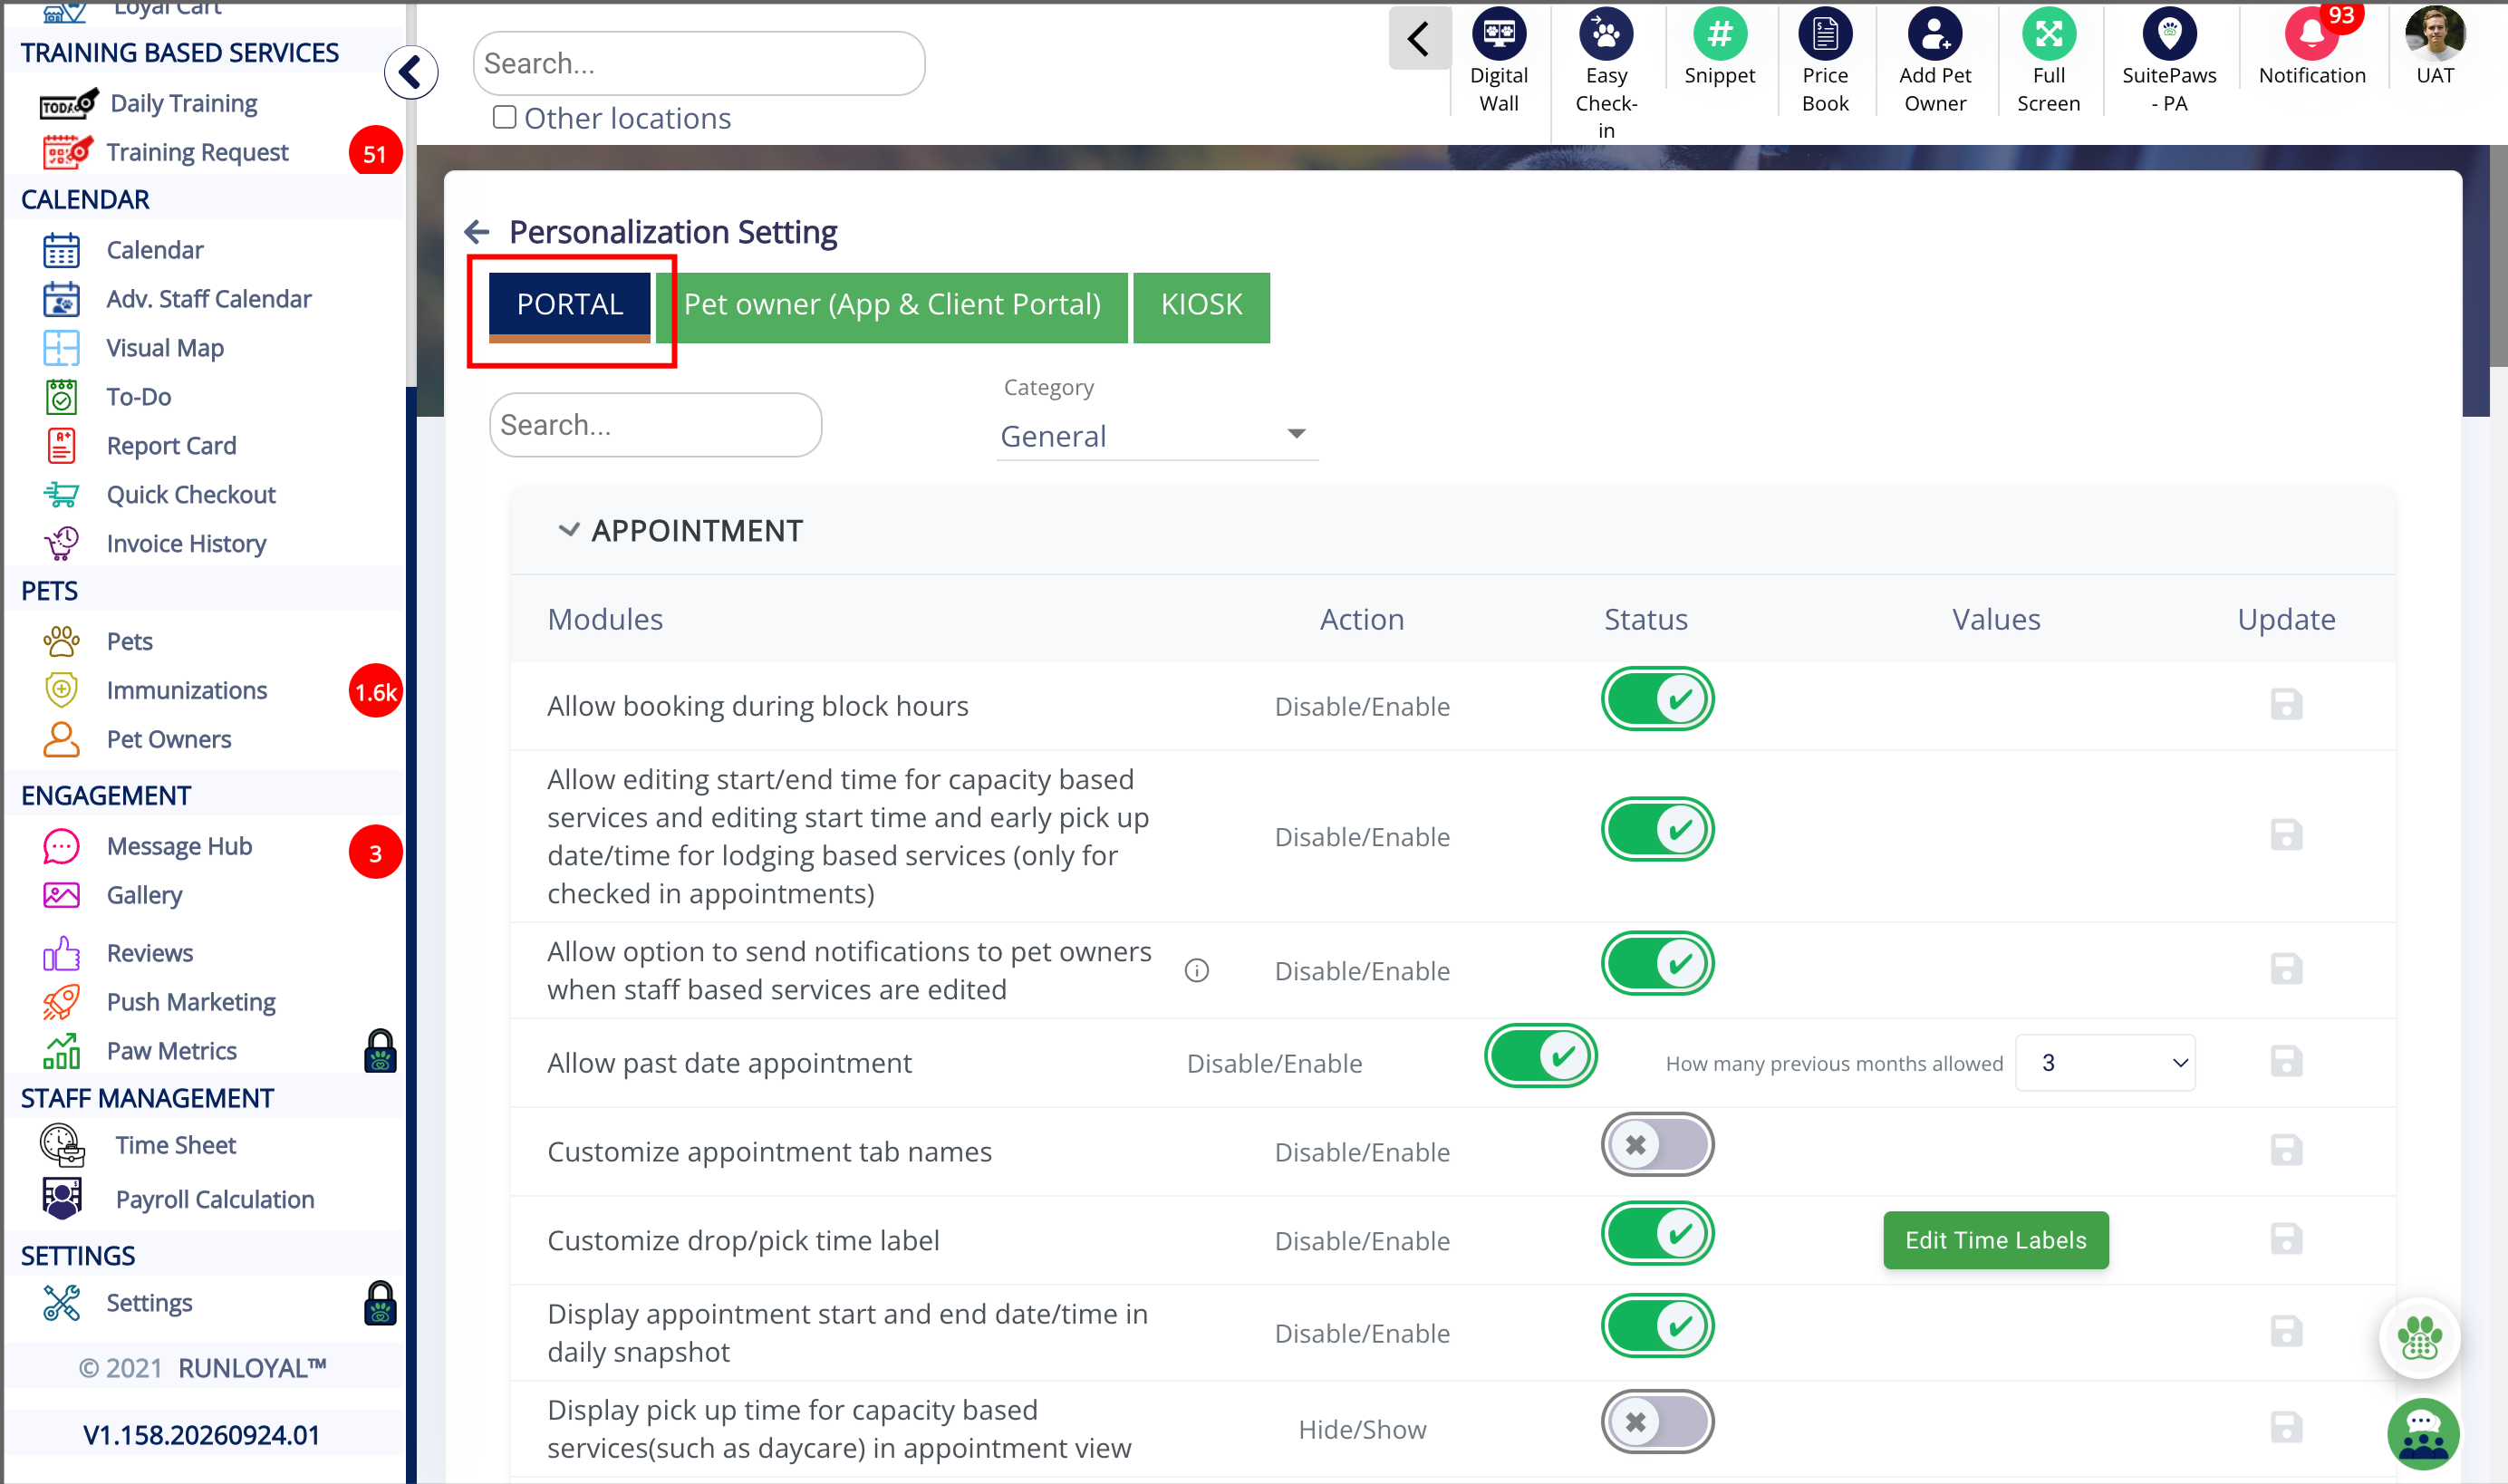
The feature is OFF by default and can be configured from:
Settings → Operations → Personalization → PORTAL → Allow Past Date Appointments
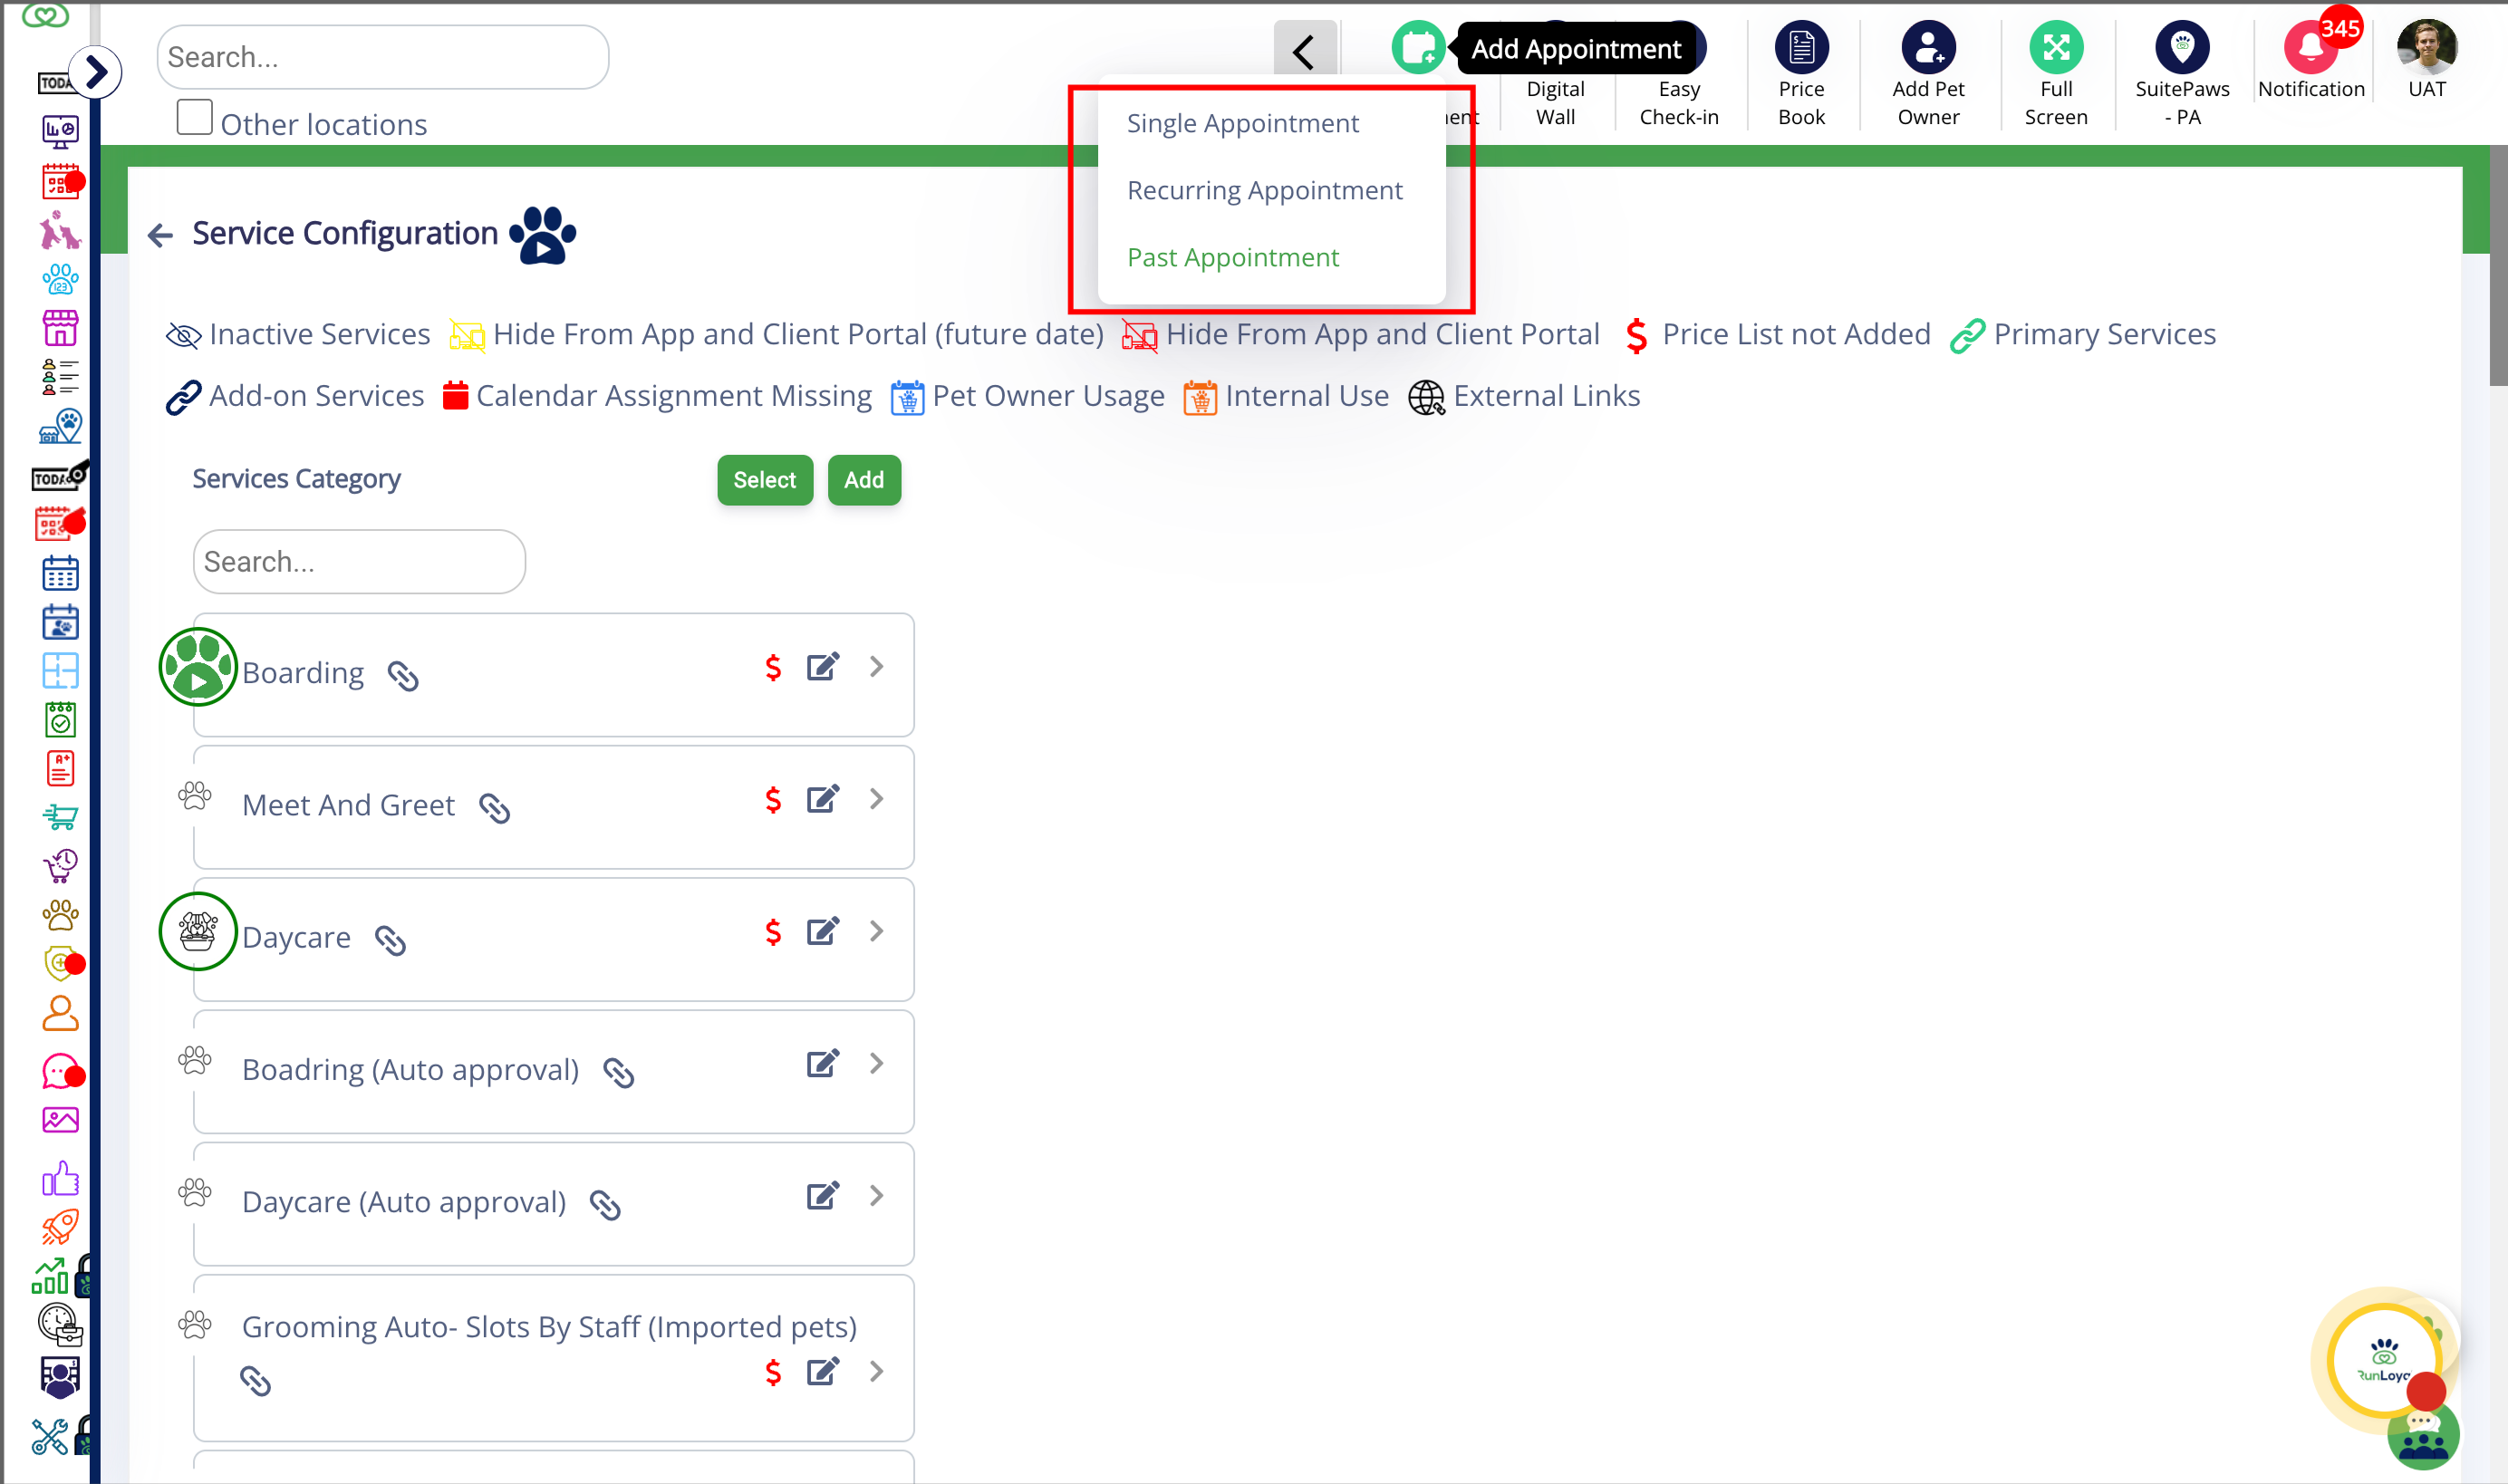
Once enabled, a Past Appointment option becomes available from the Add Appointment menu. Staff can use the standard appointment booking flow and select a past date within the configured lookback period.
How to book Past Appointment?
1. Open Personalization Settings
2. Portal
3. Past date Appointment
4. Select Past Appointment
5. Choose Pet
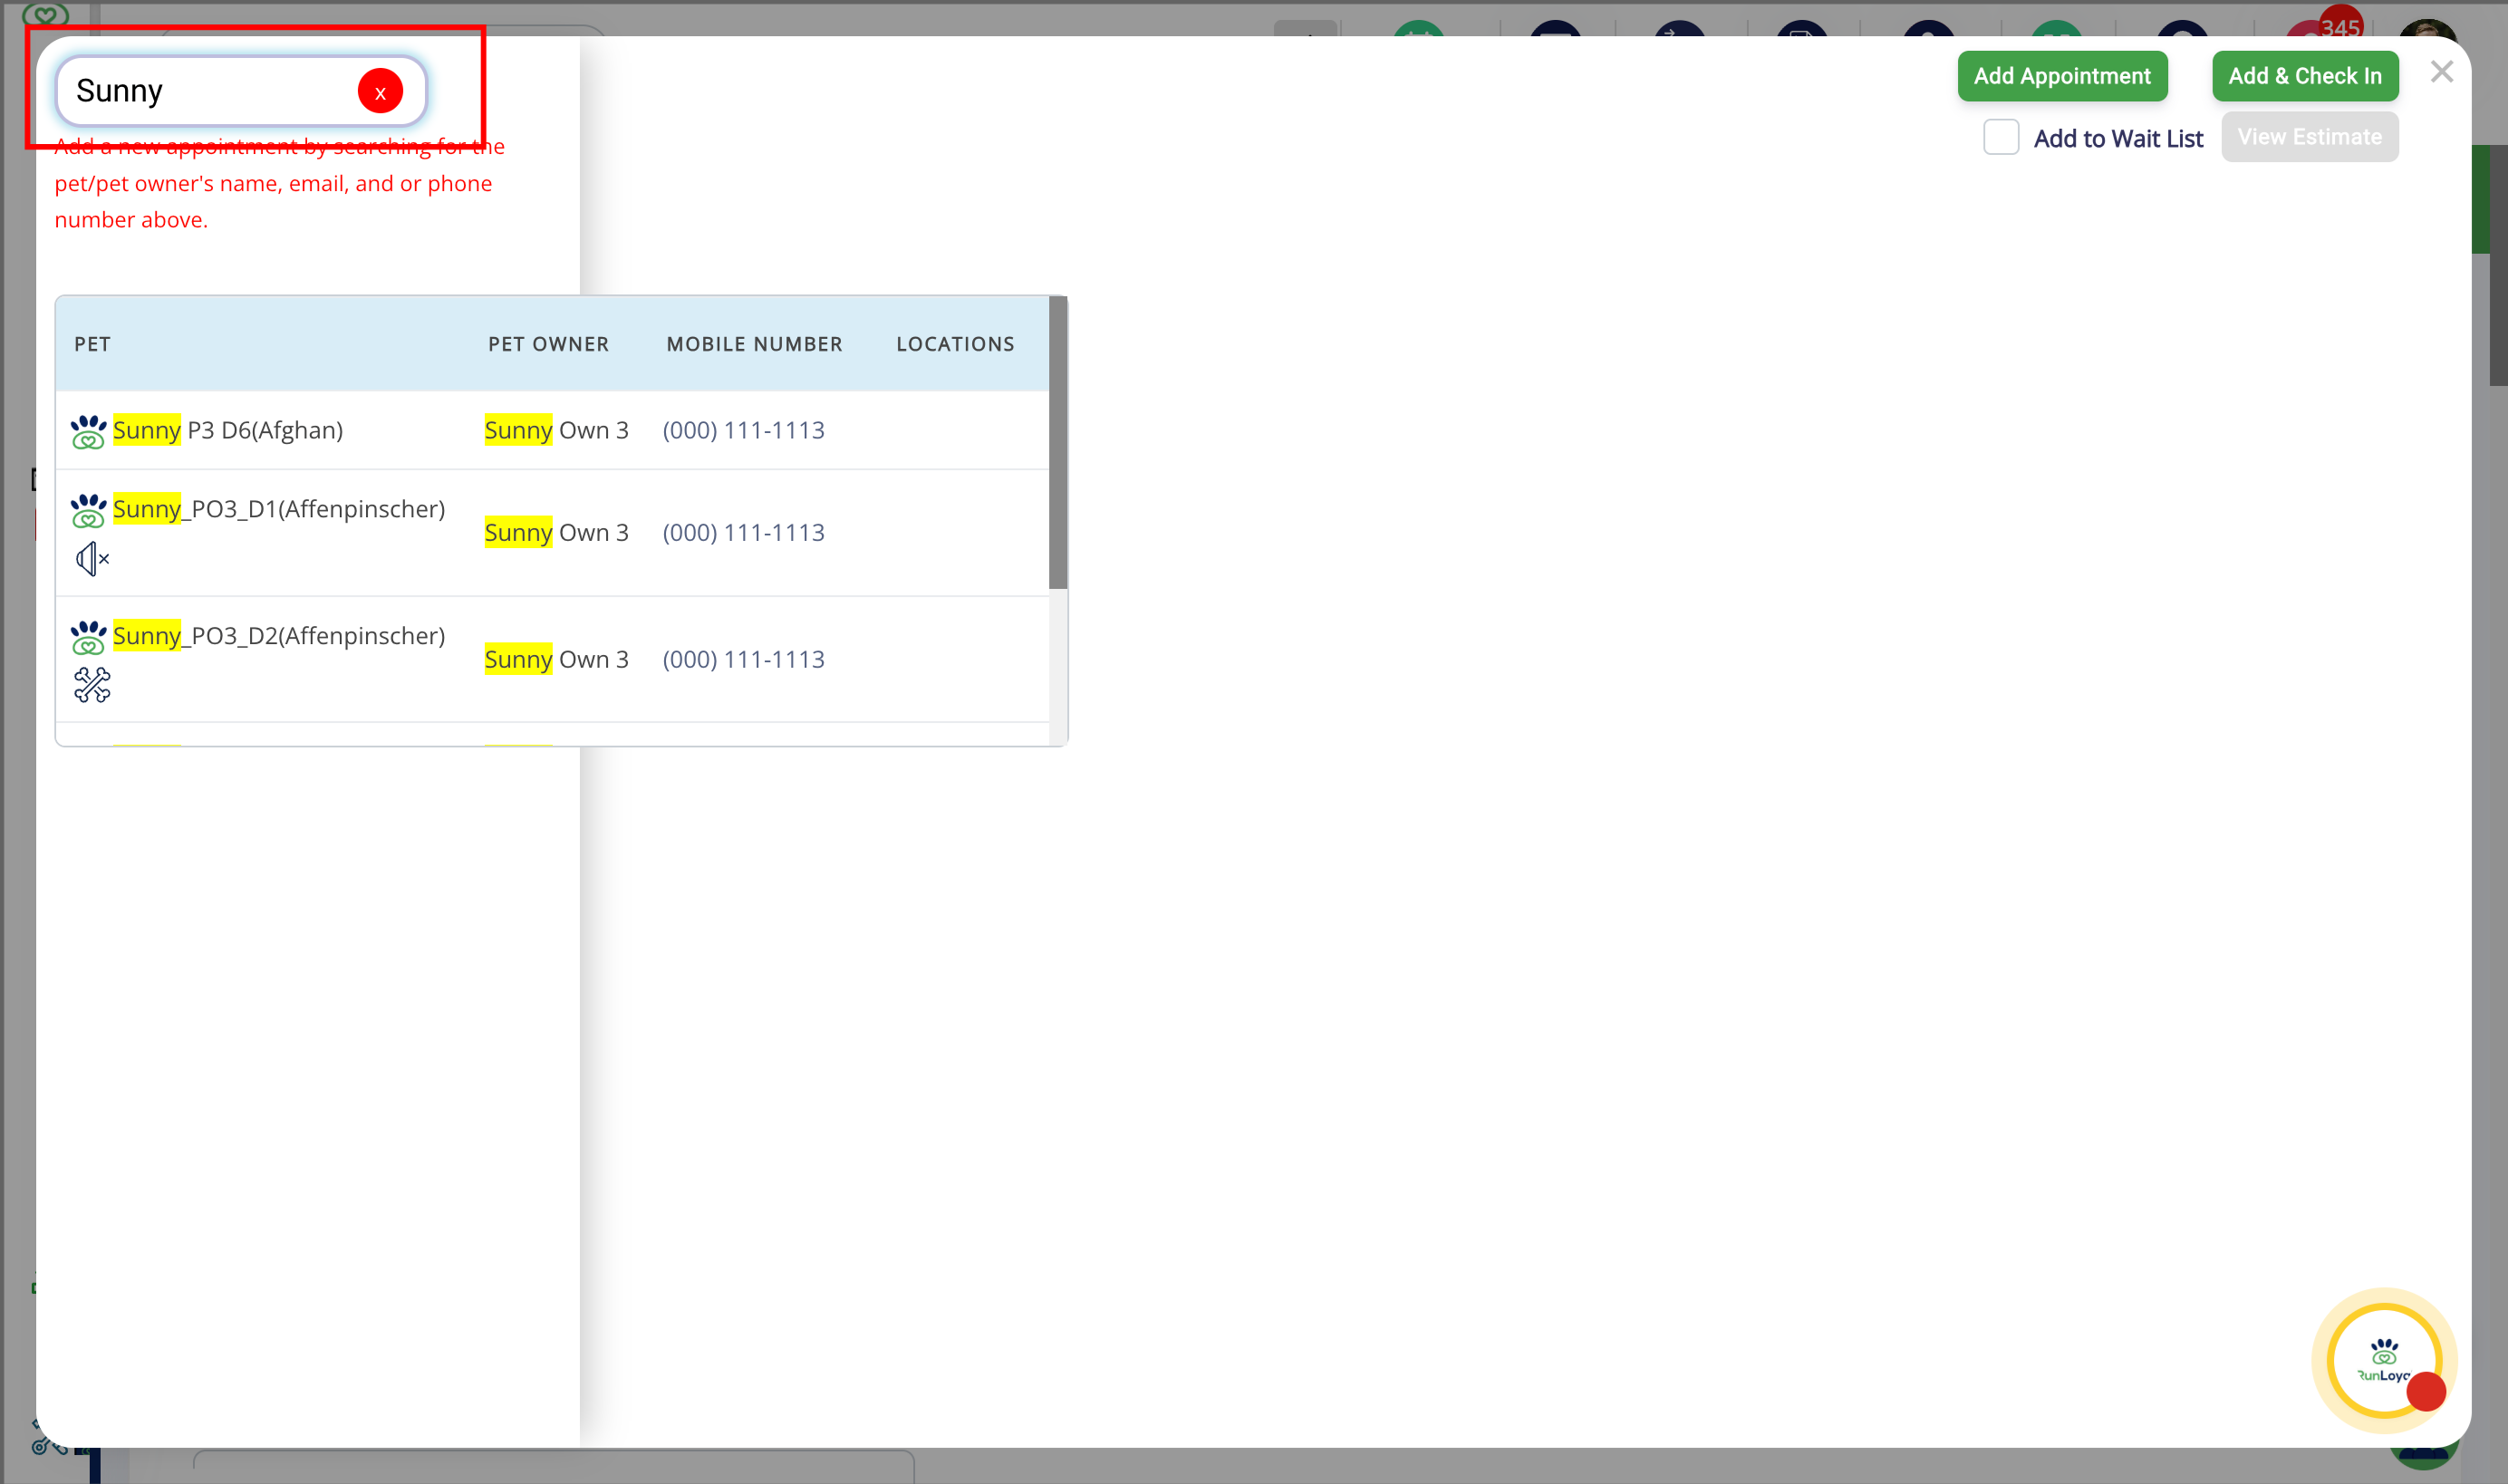
6. Make selection
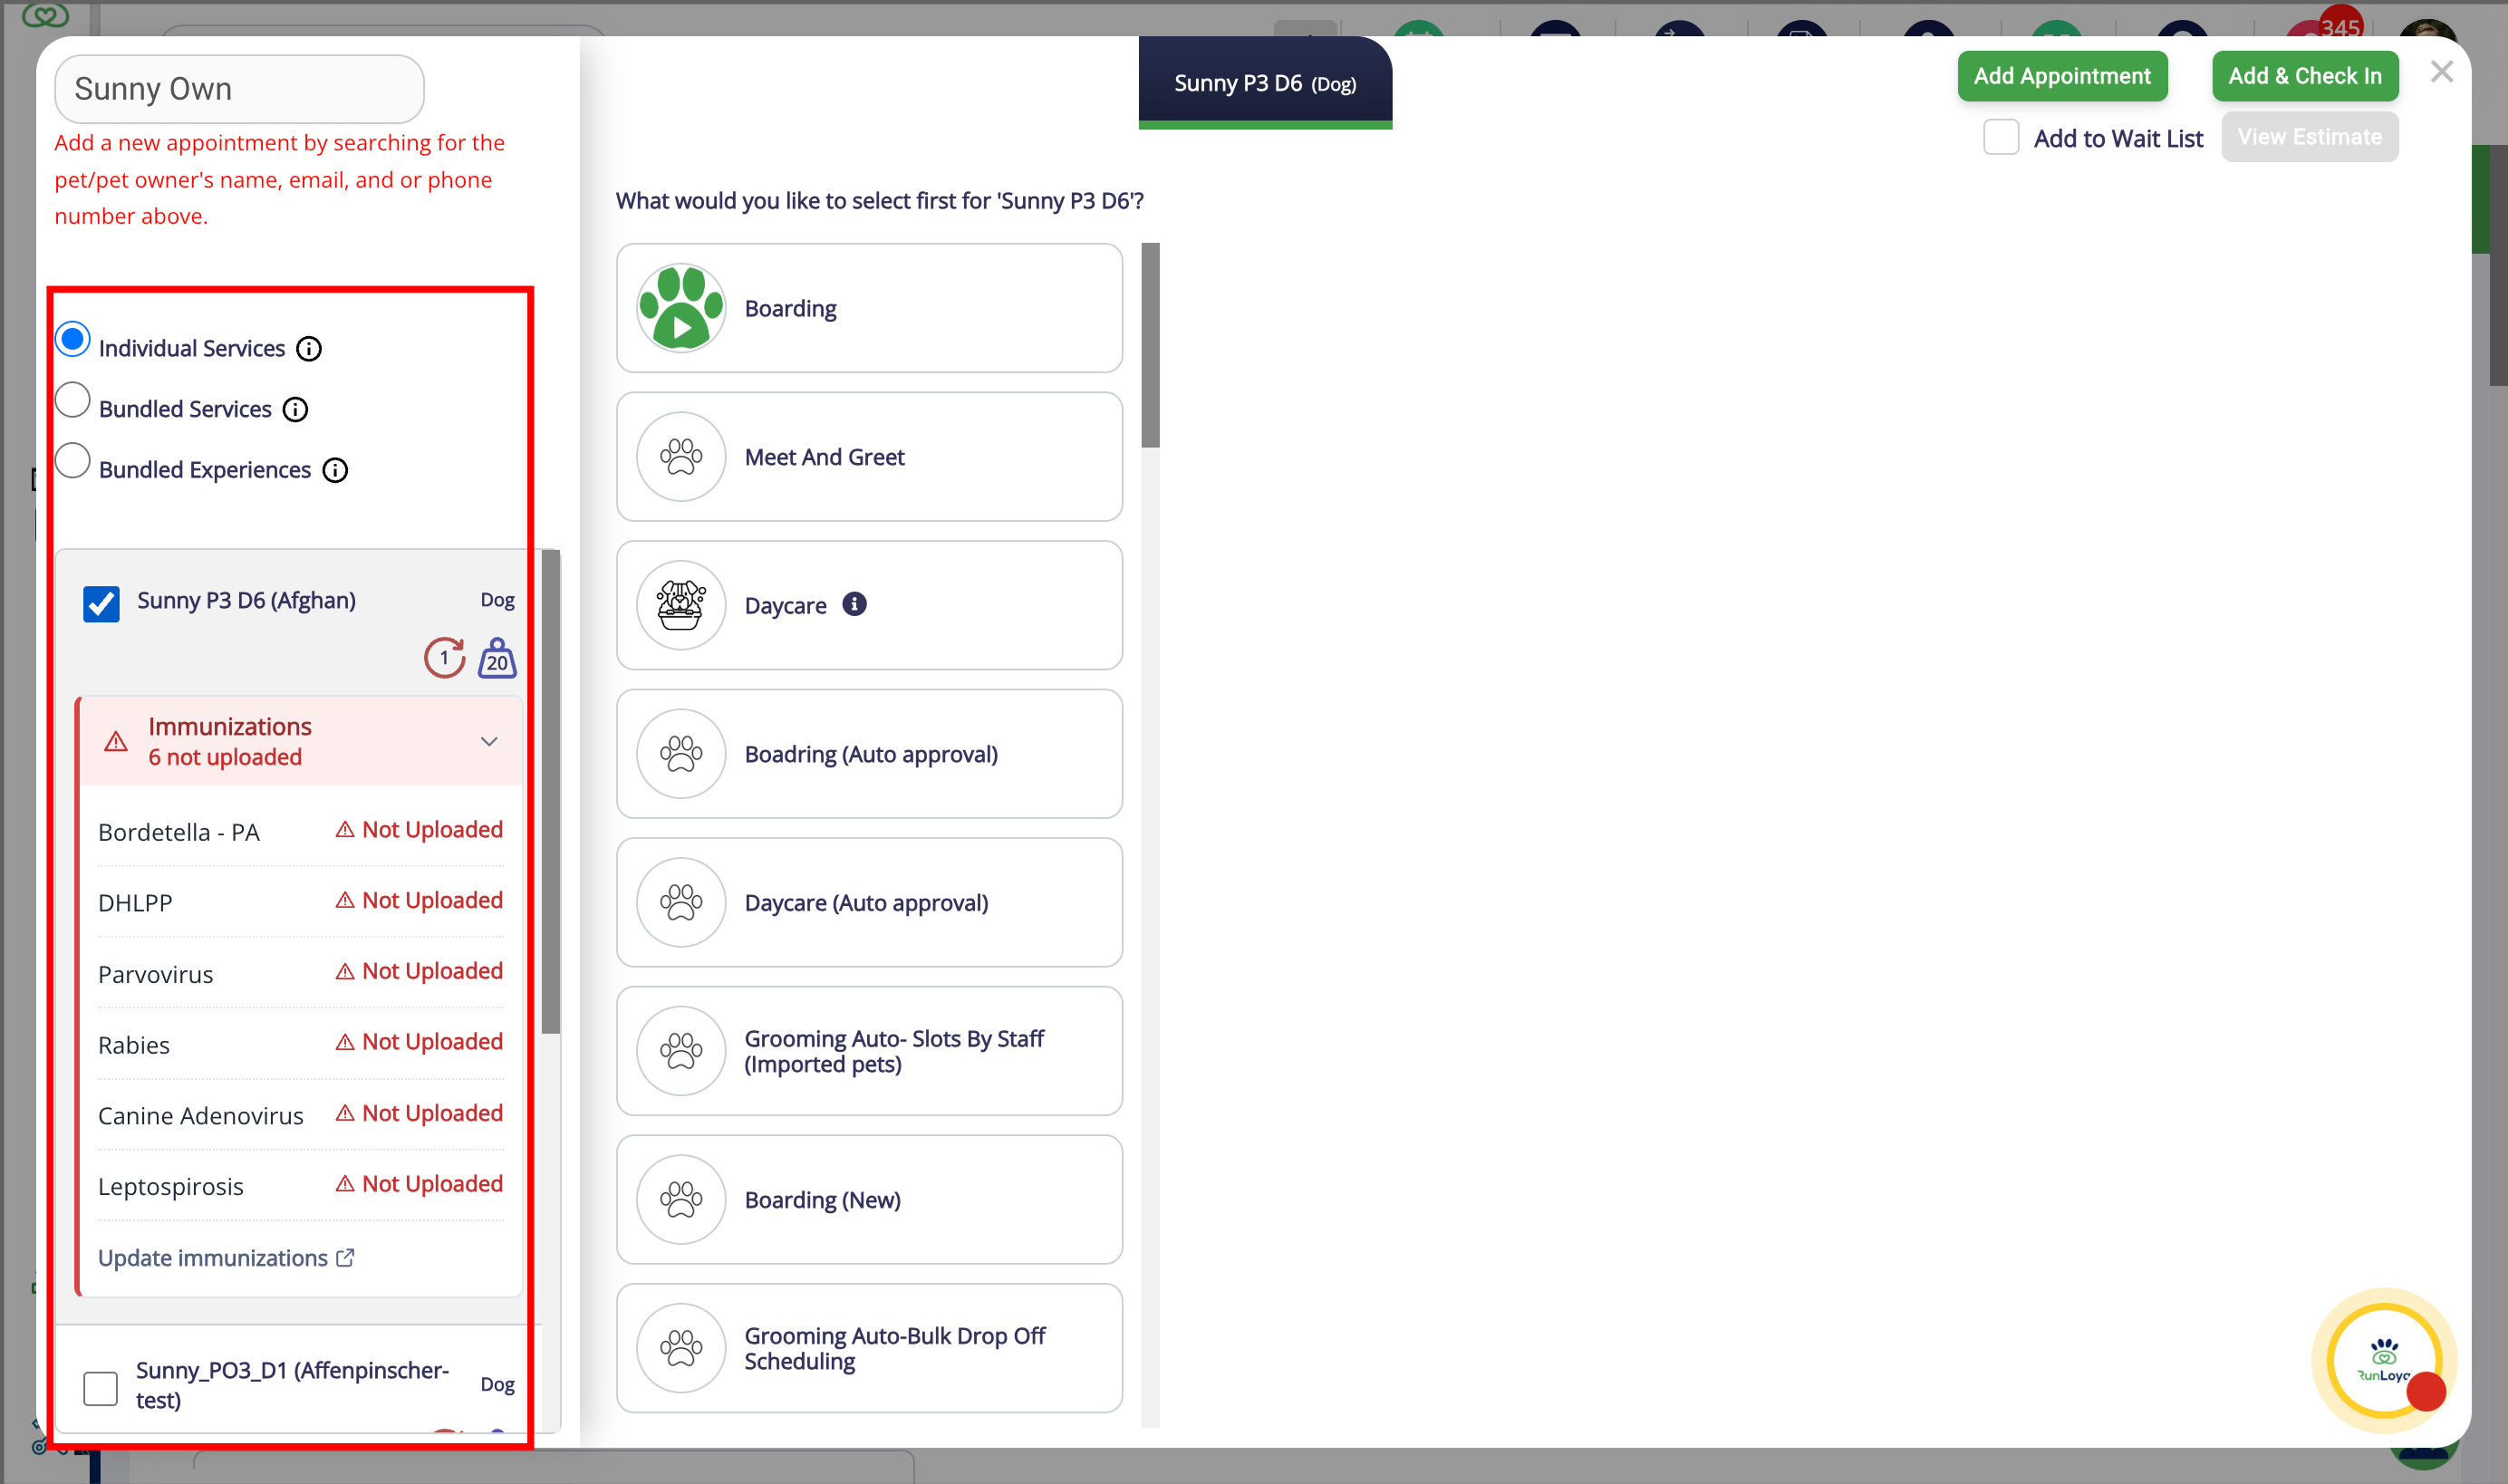
7. Service Category
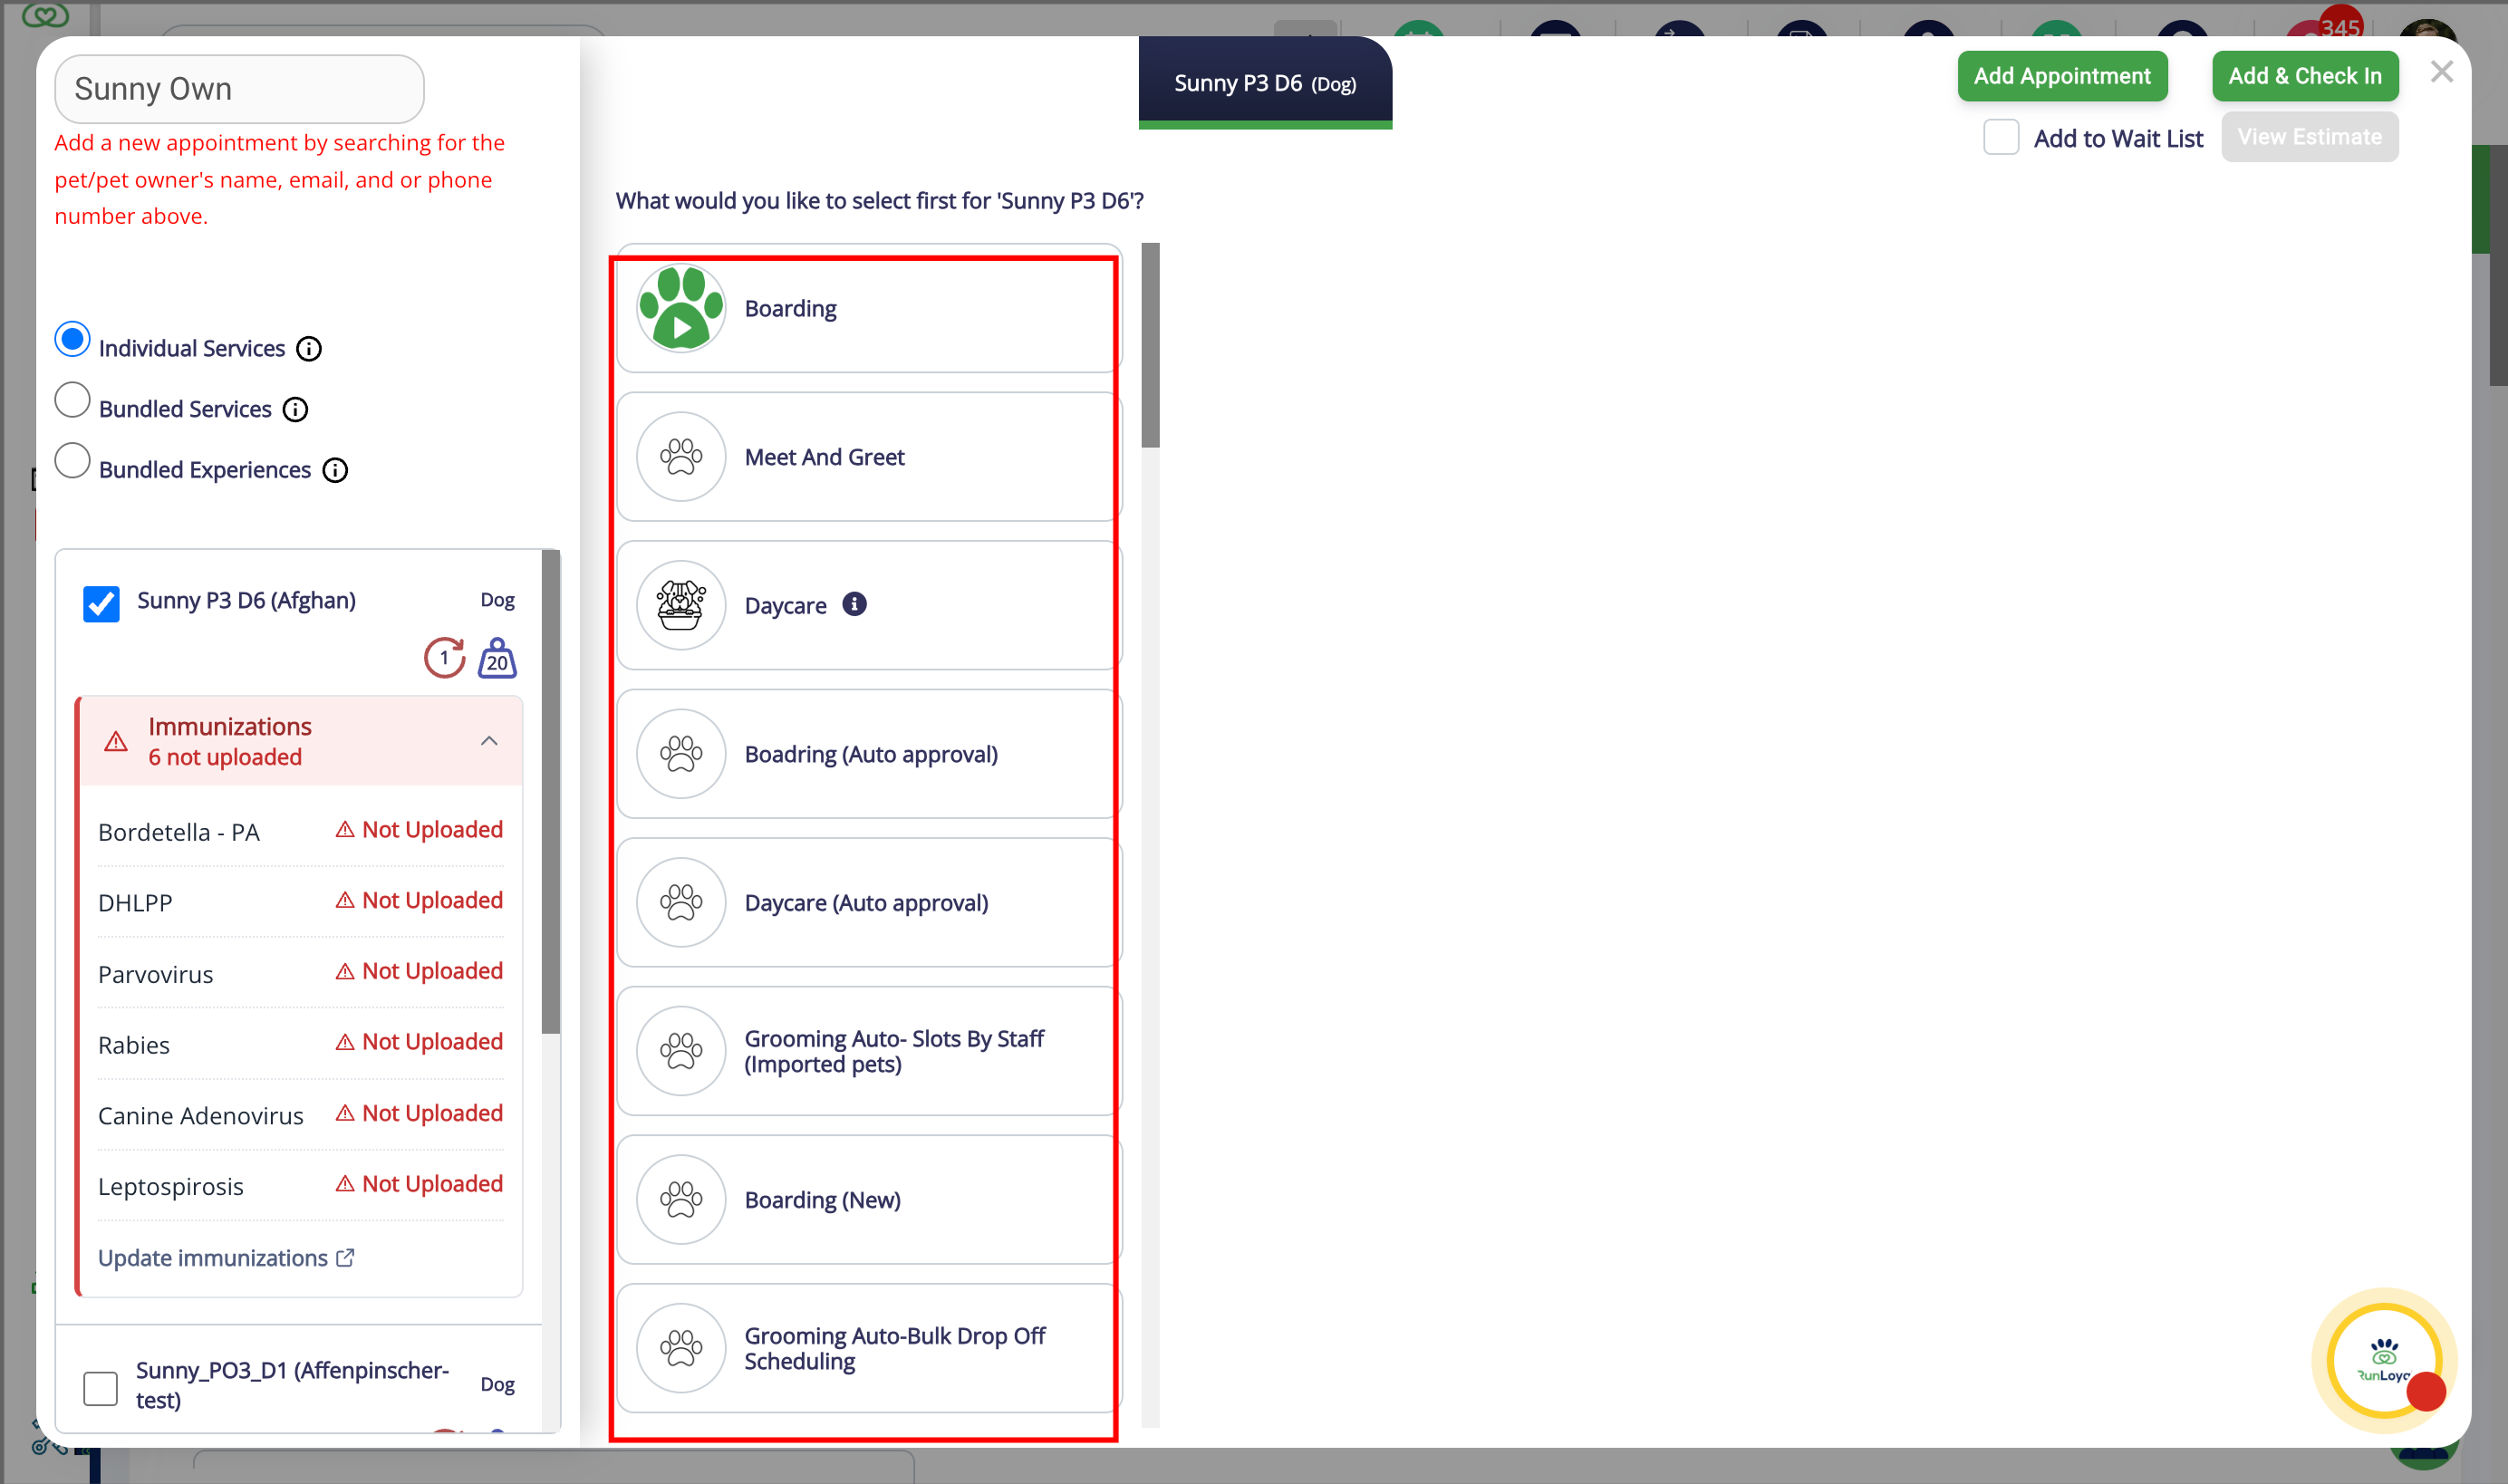
8. Service Type
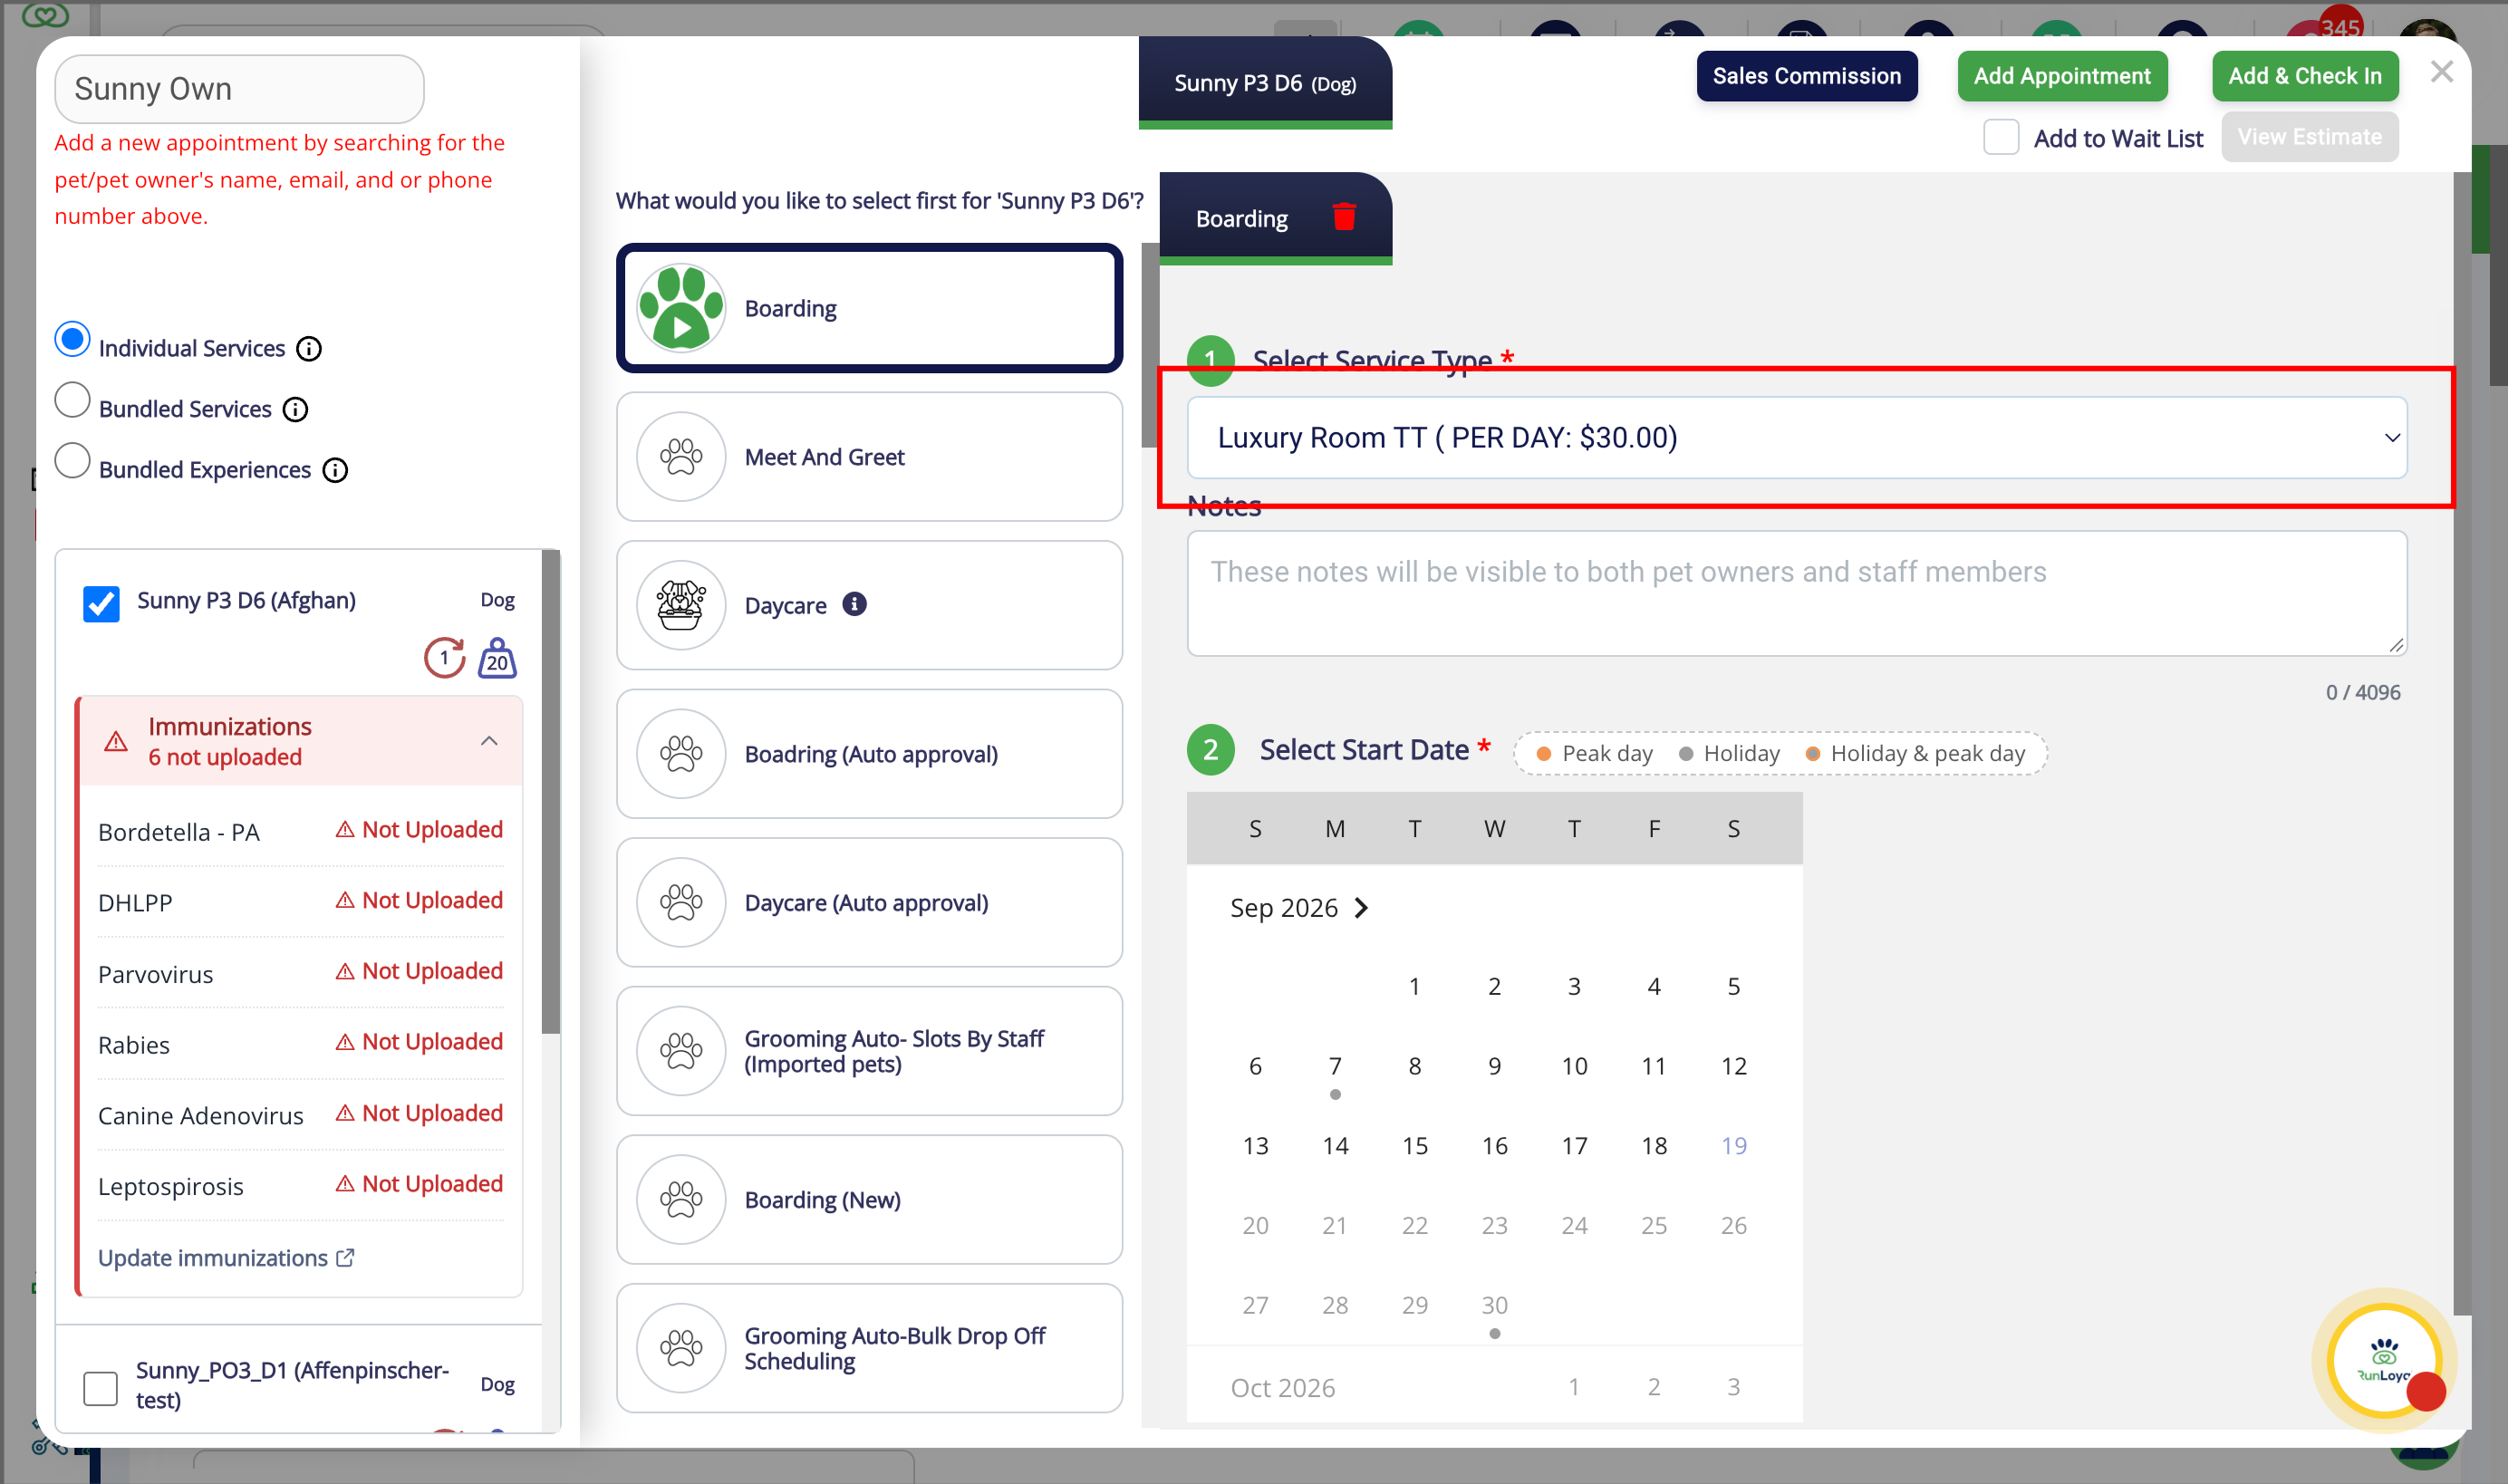
9. Start Date
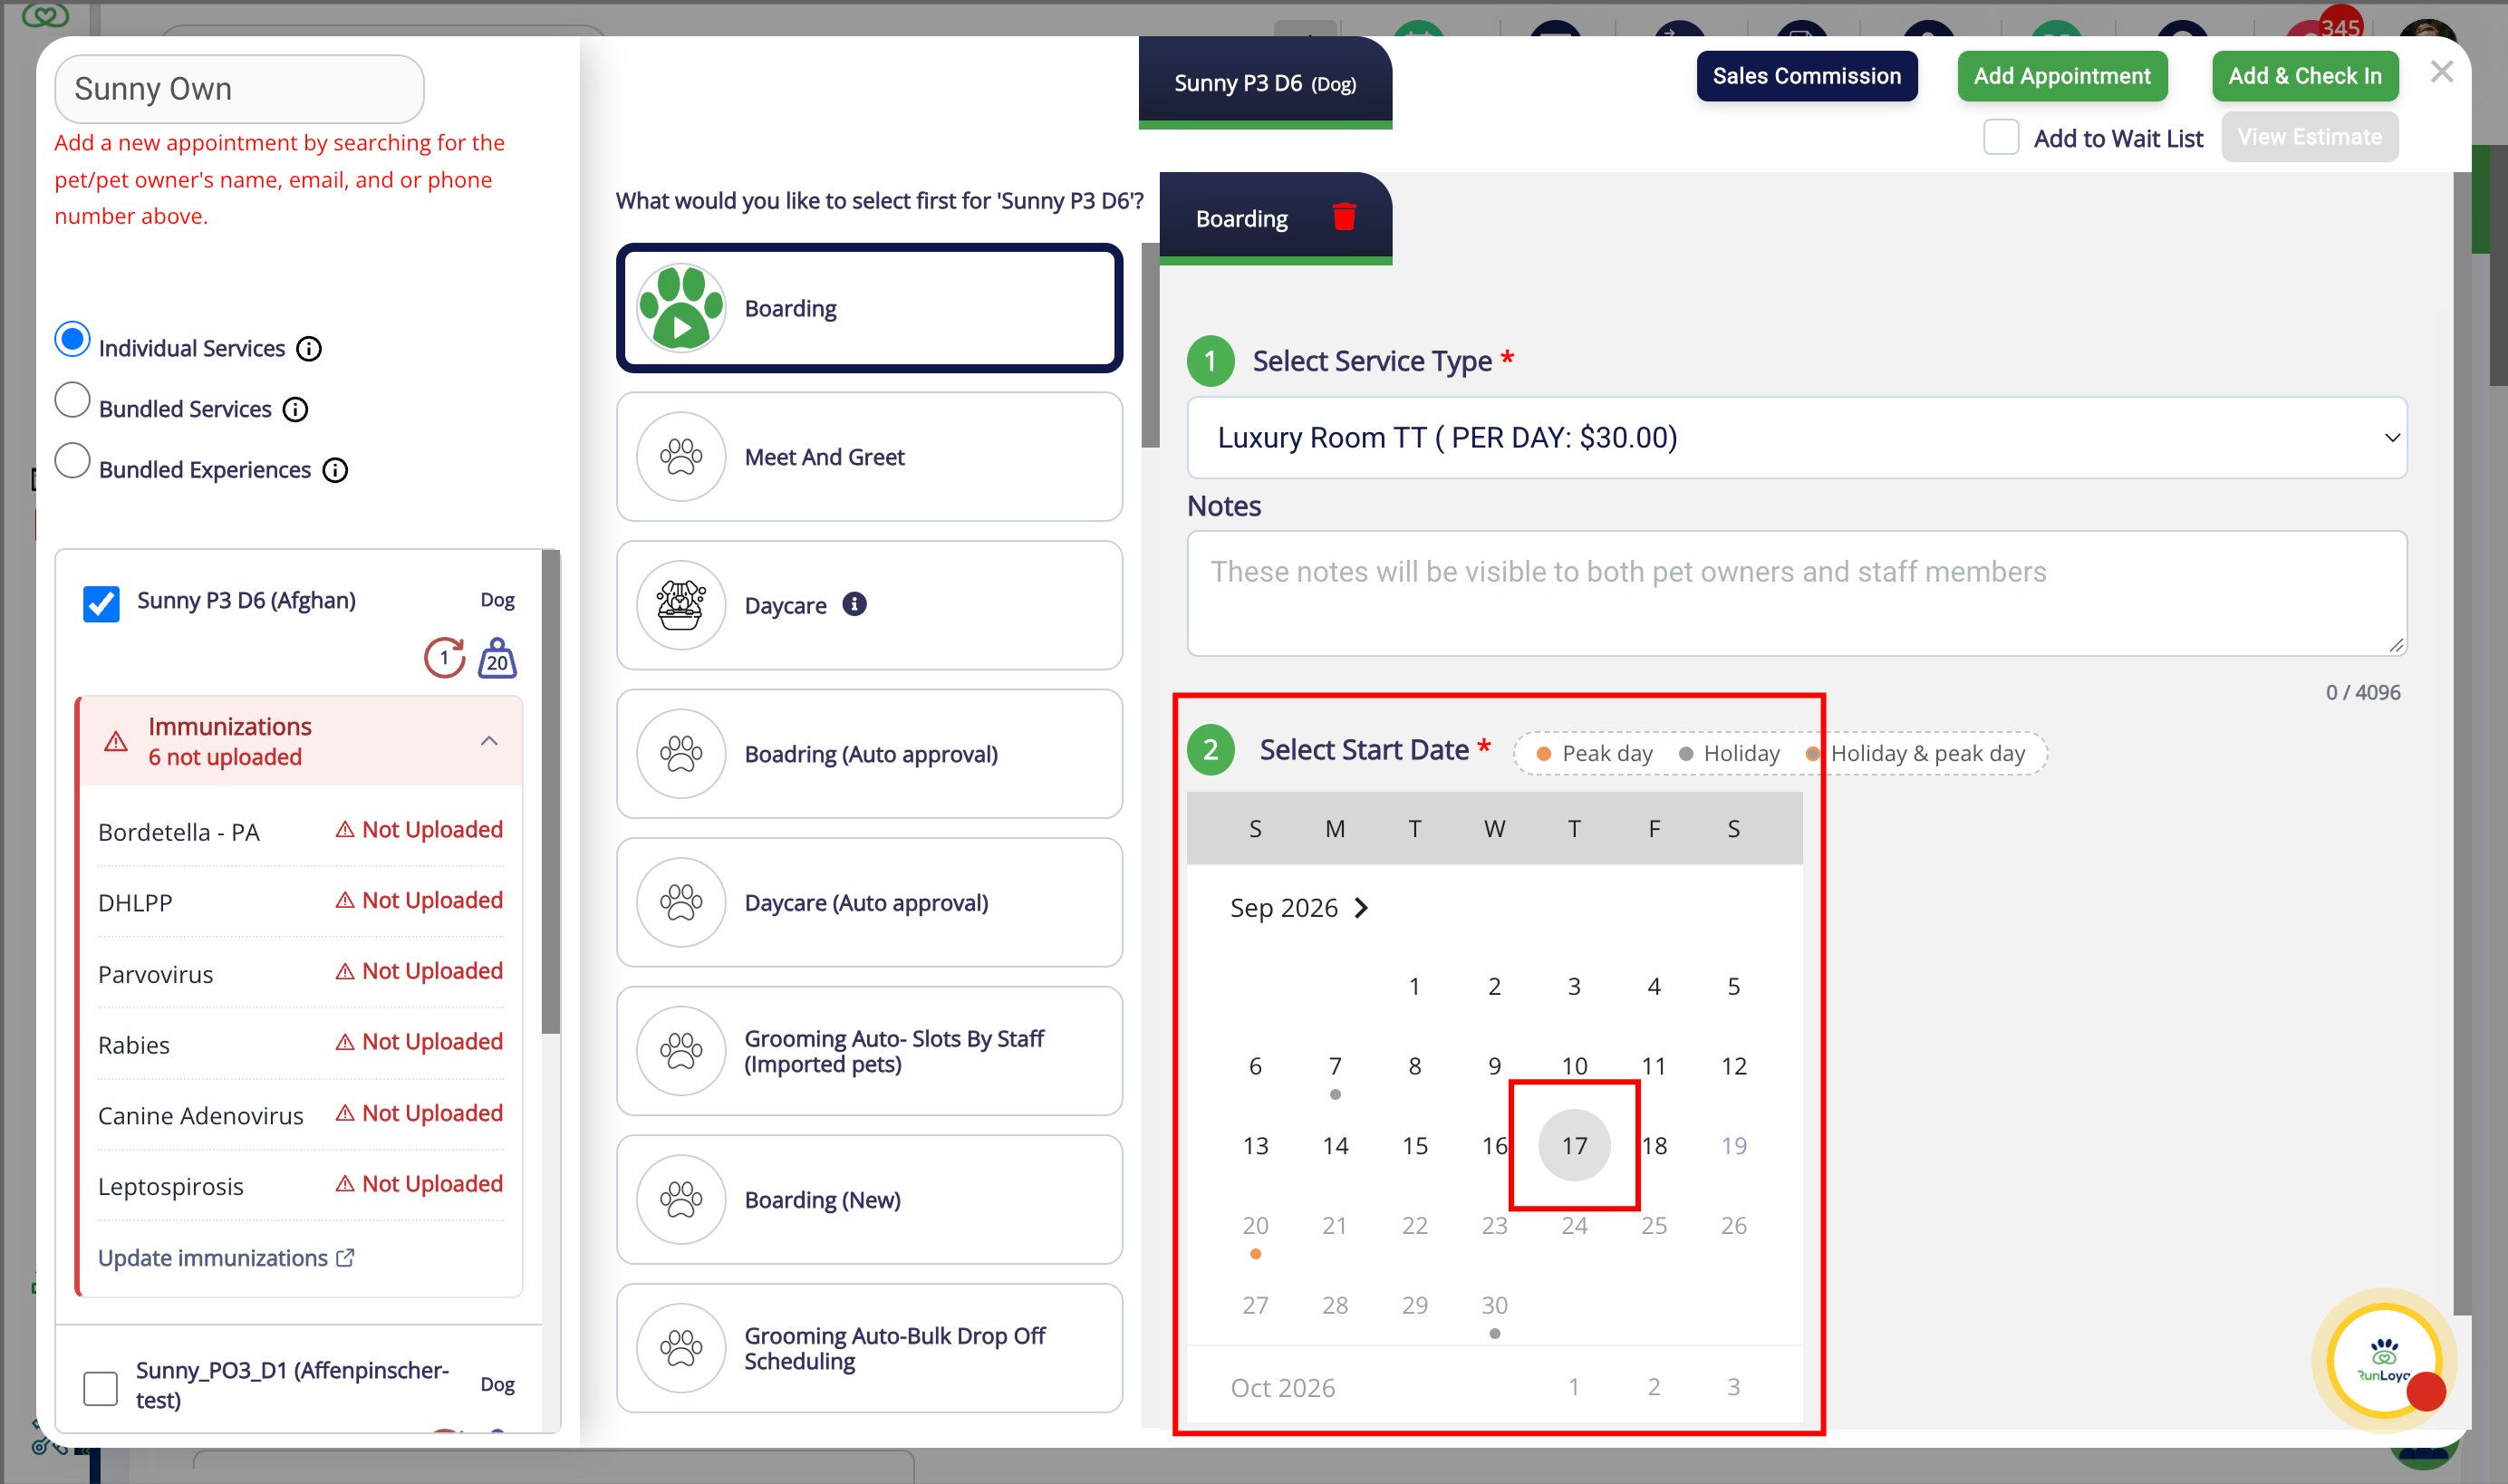
10. Select Appointment Time
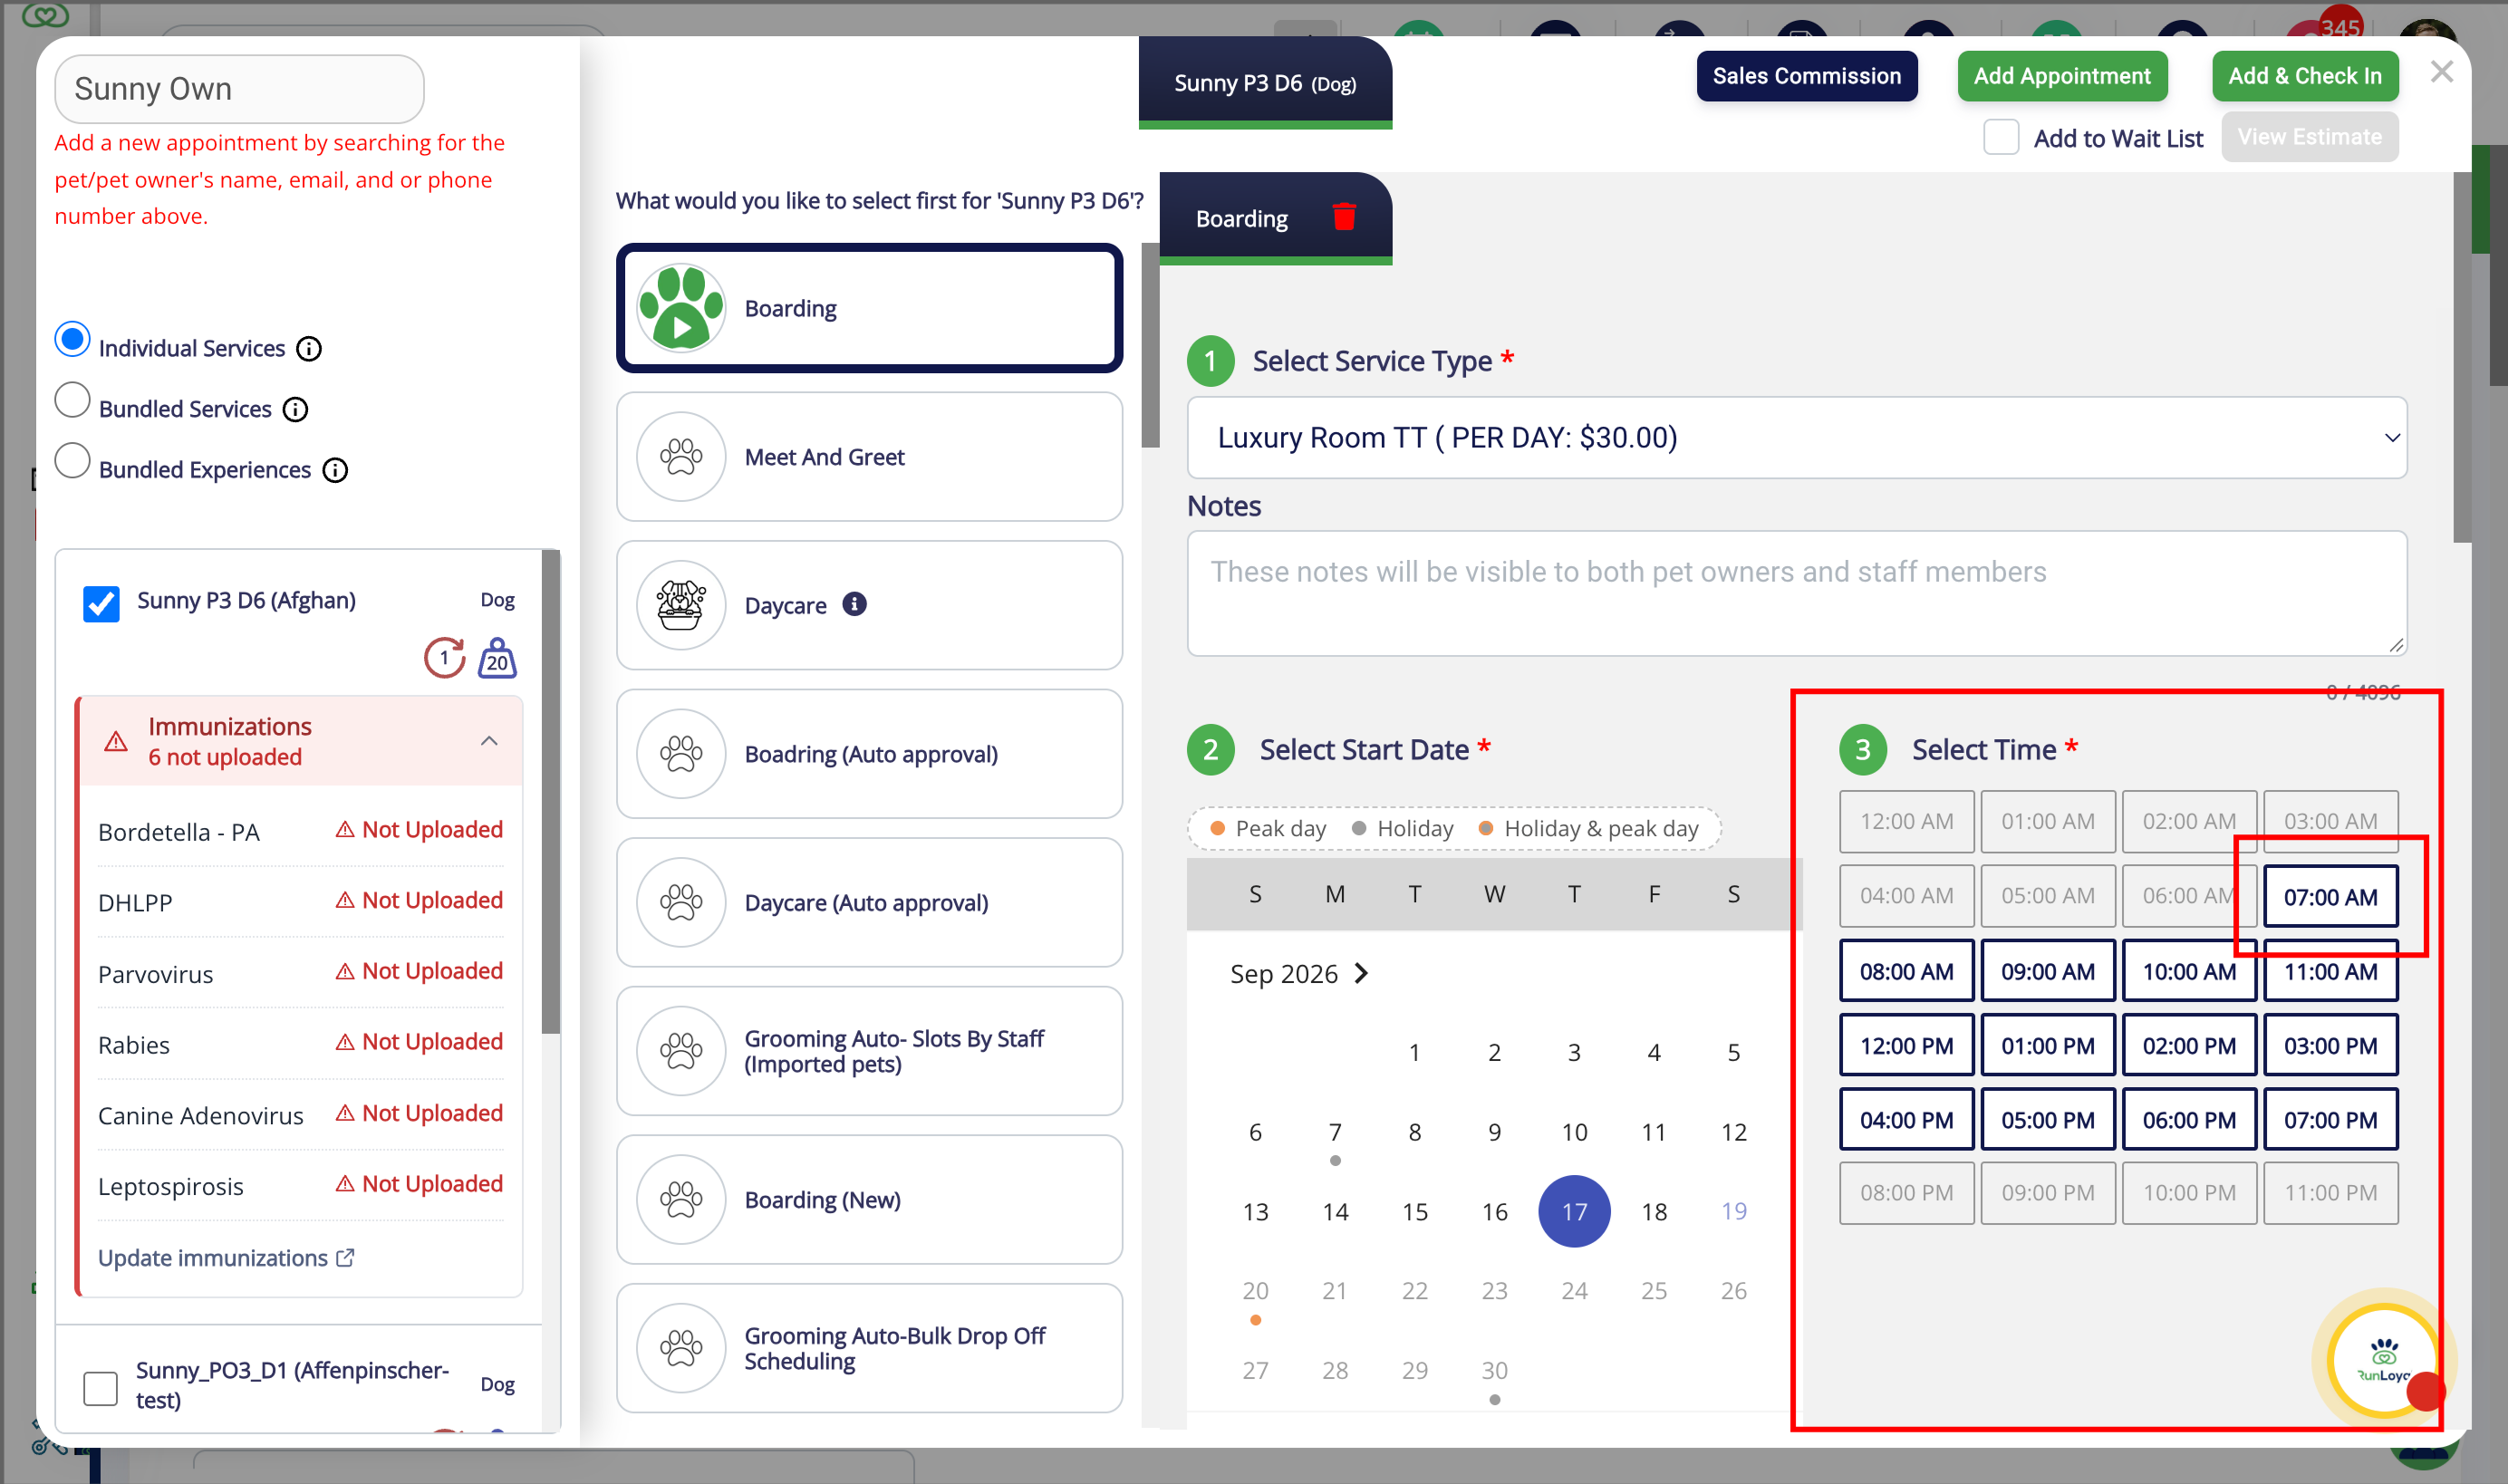
11. End Date
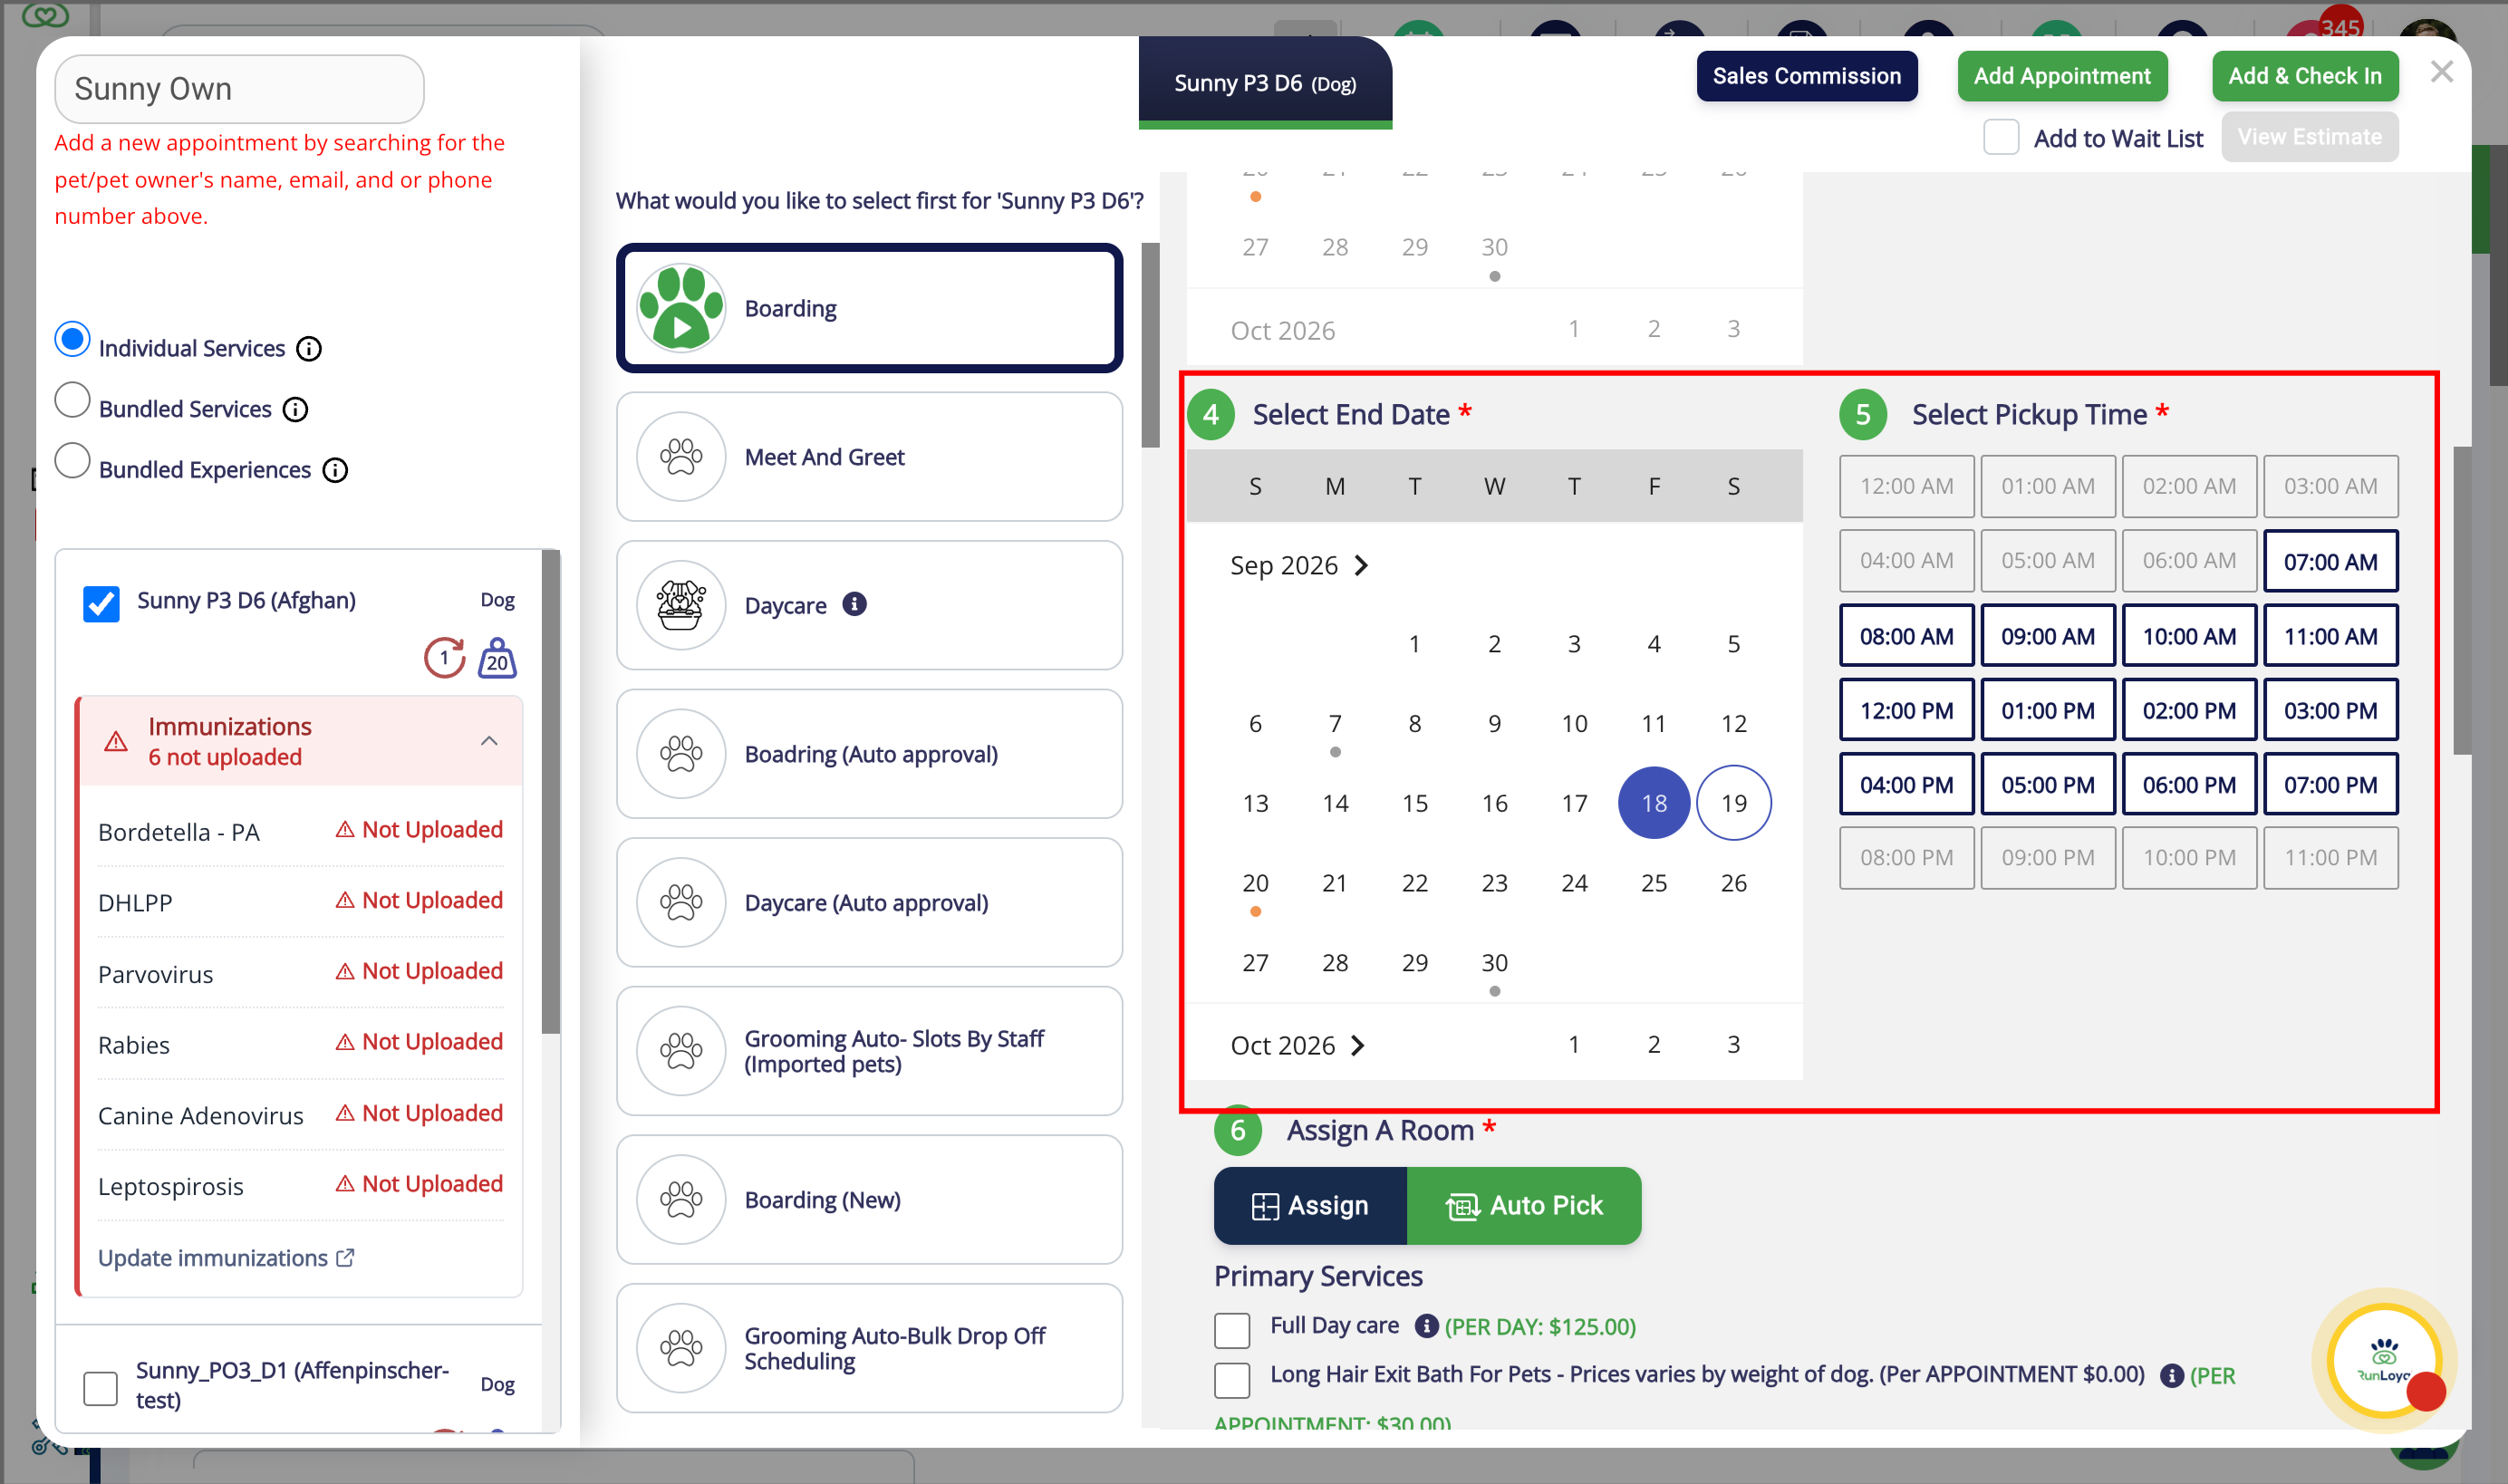
12. Assign A Room
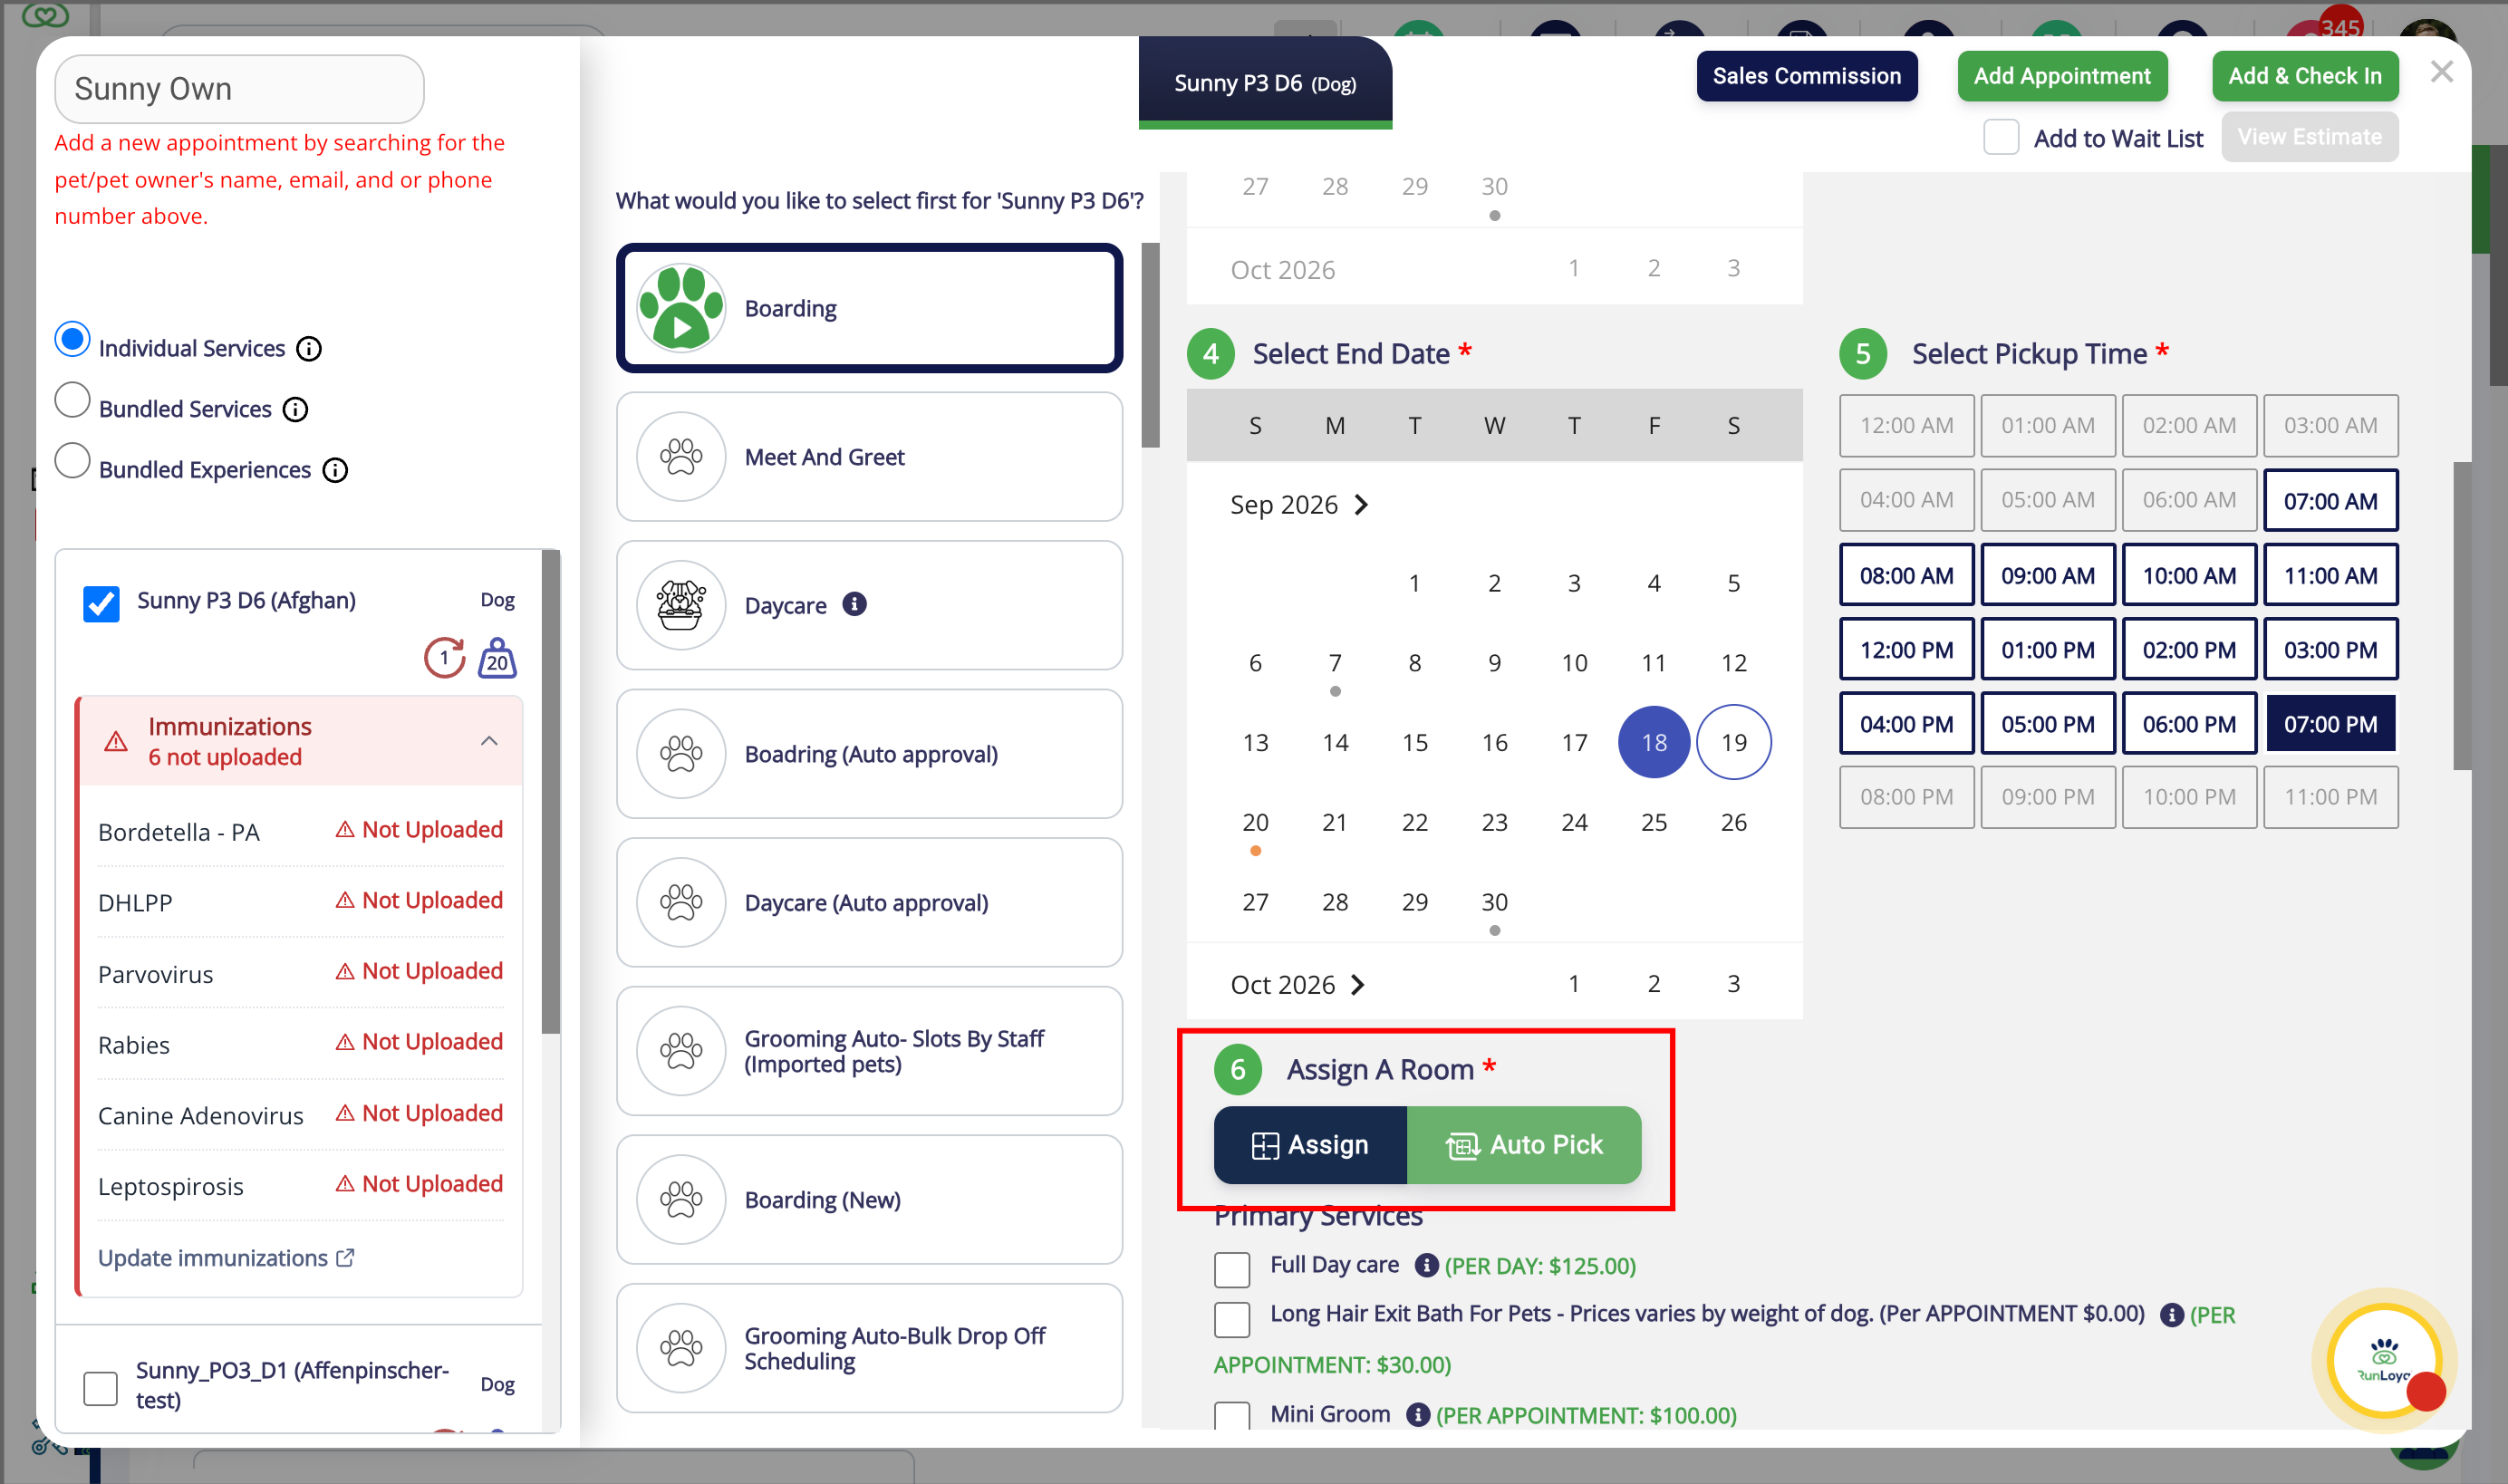
13. Confirm
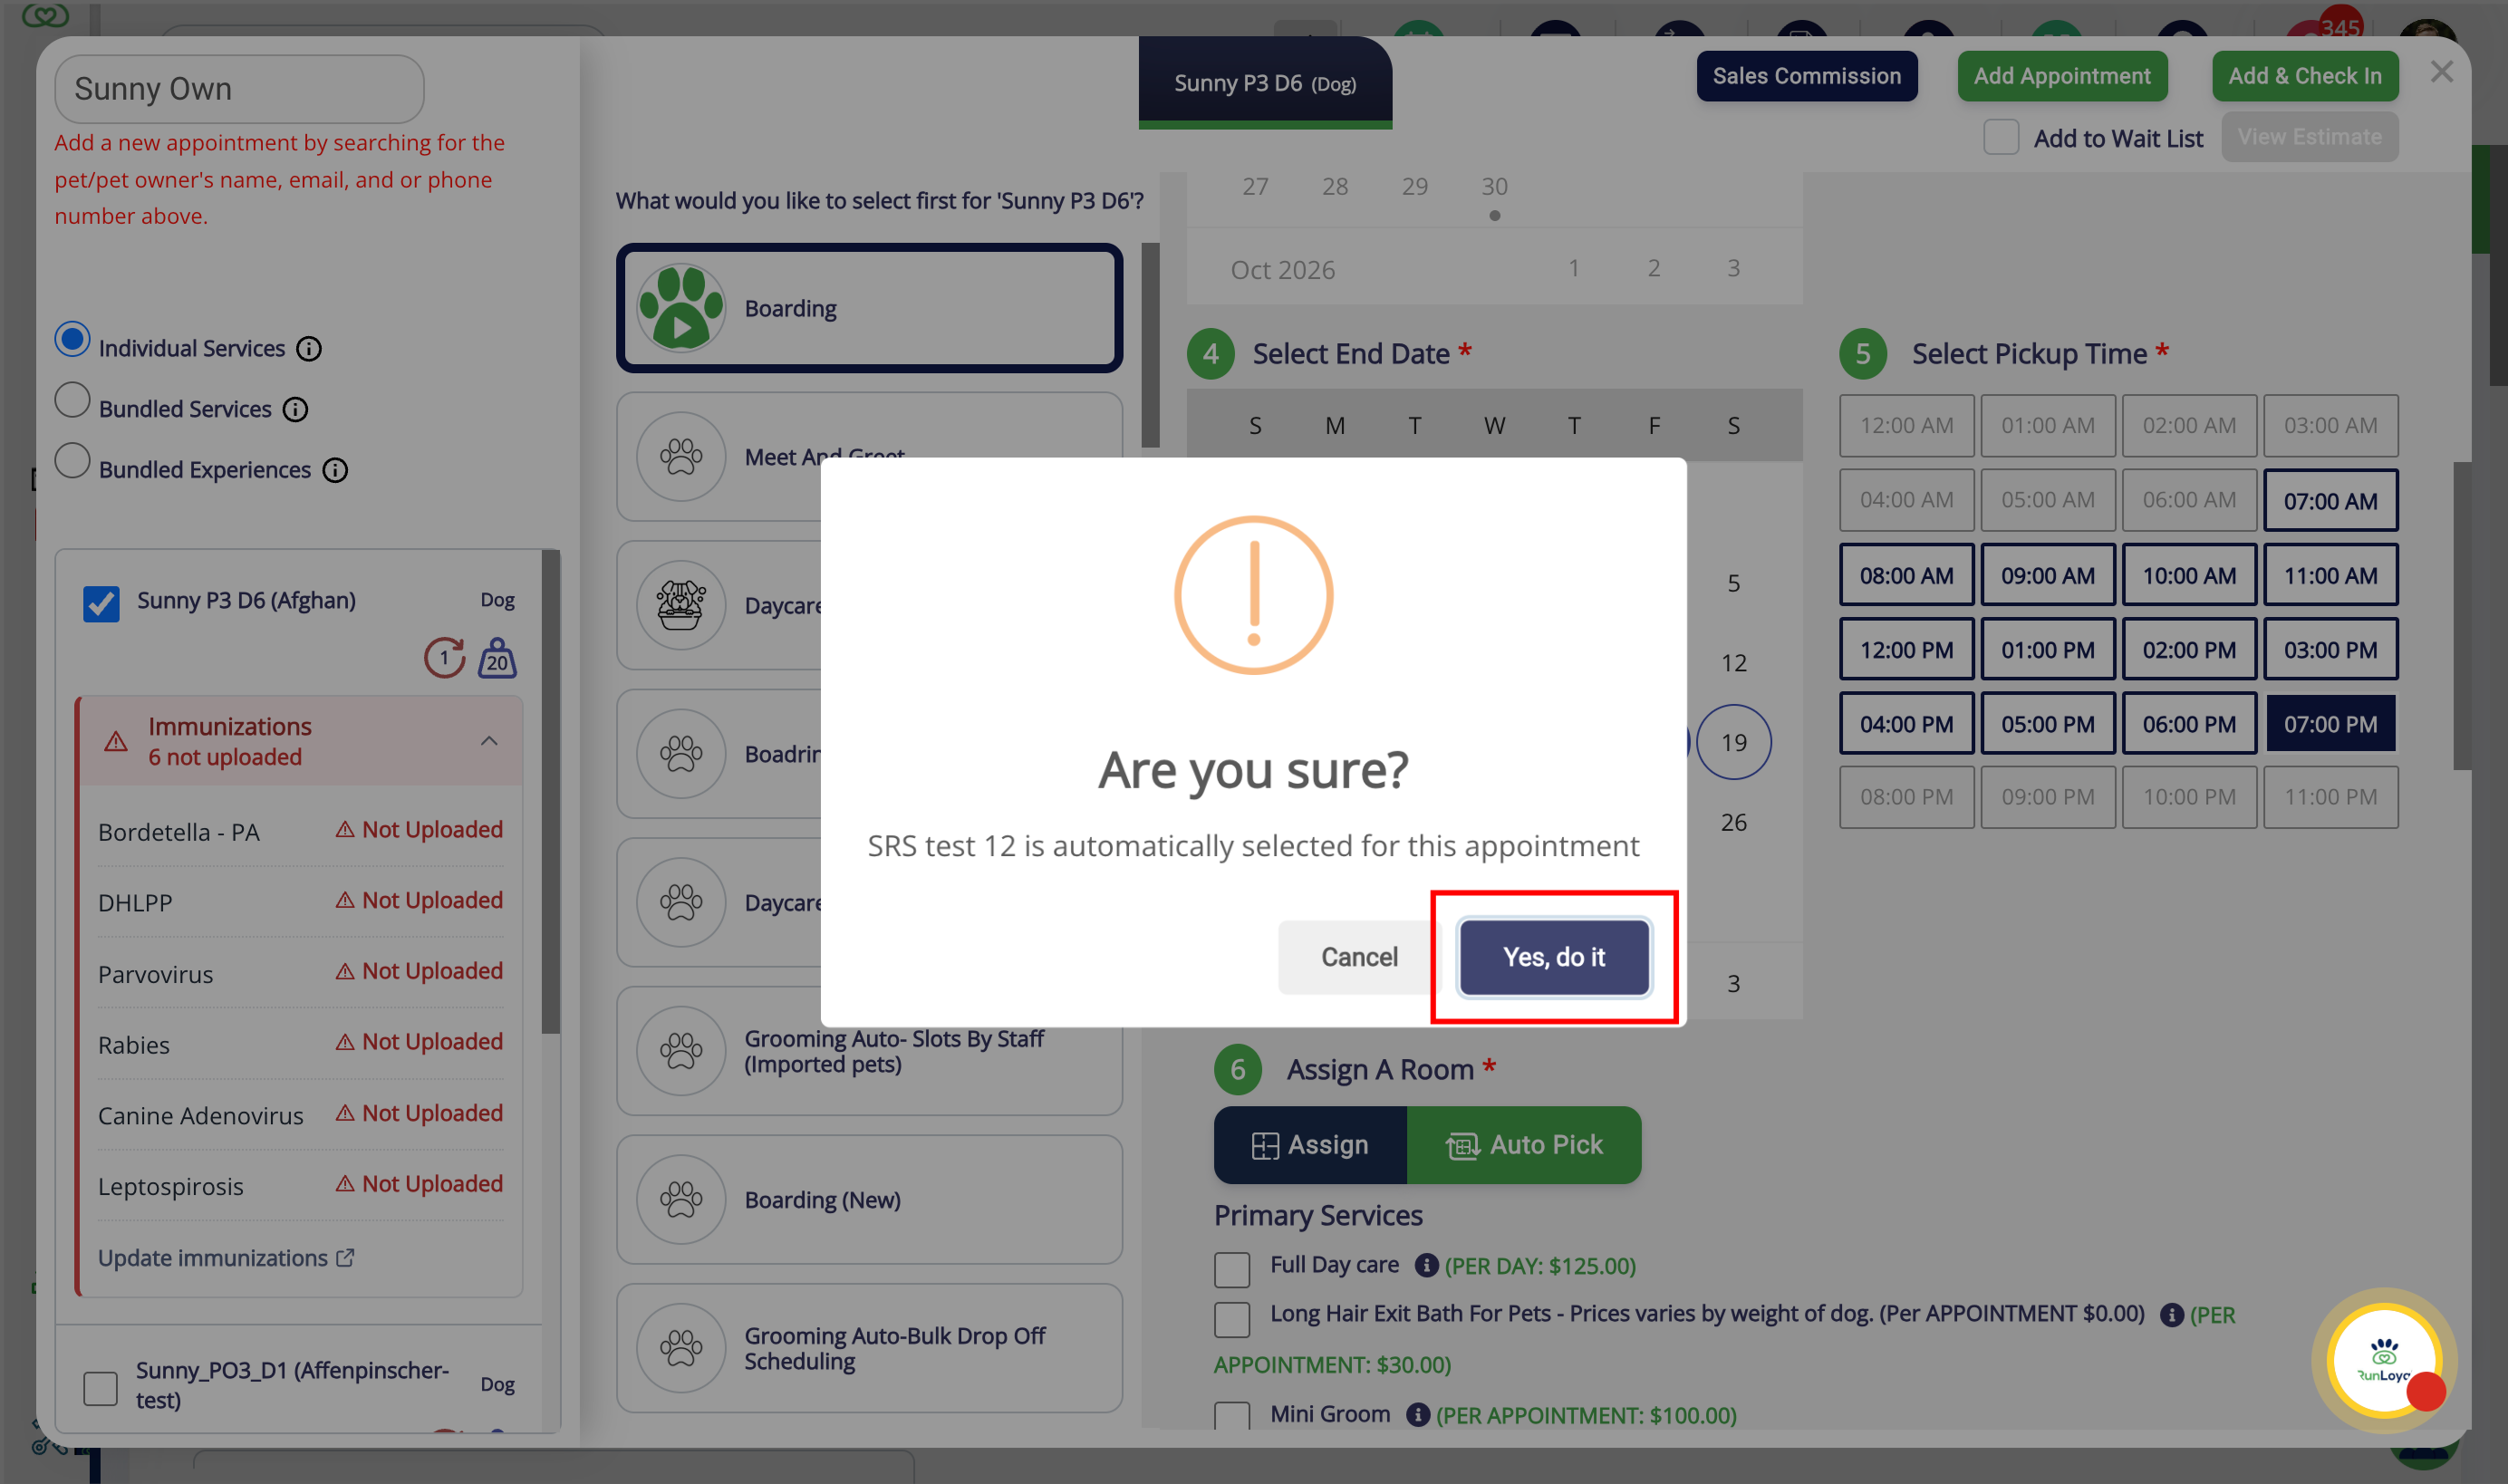
14. Add Appointment and Check In
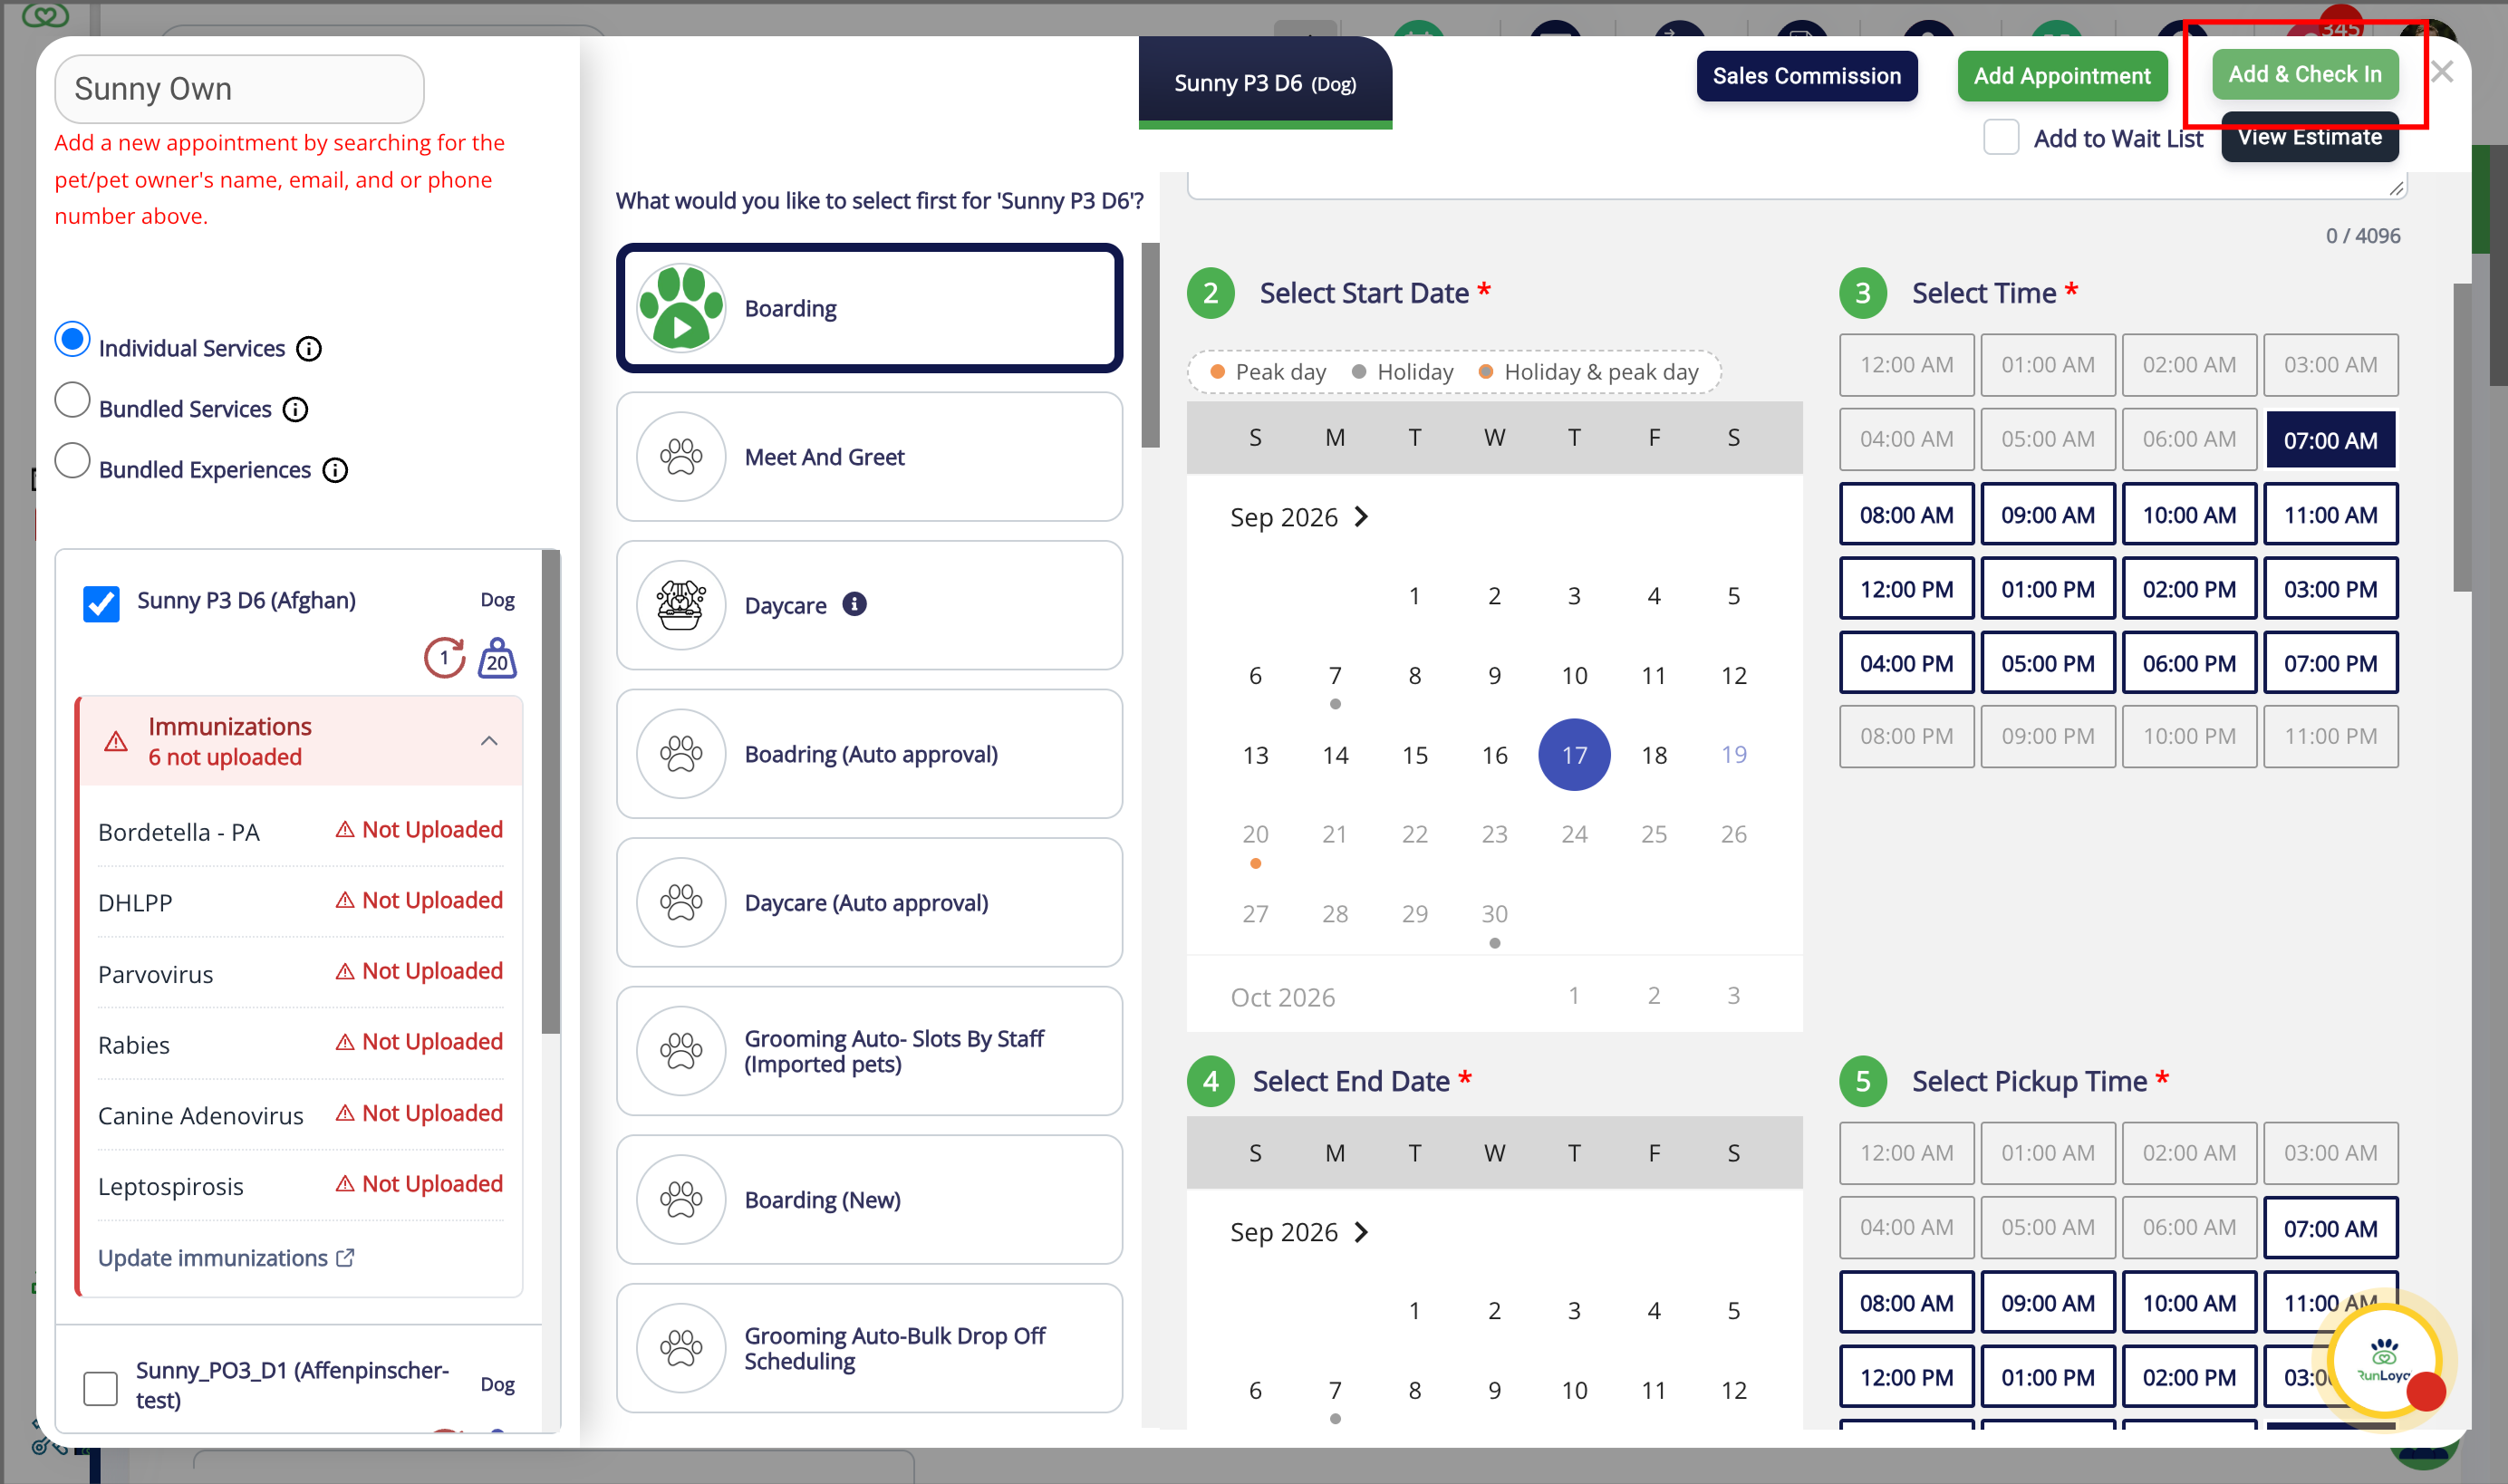
15. Check In Pet
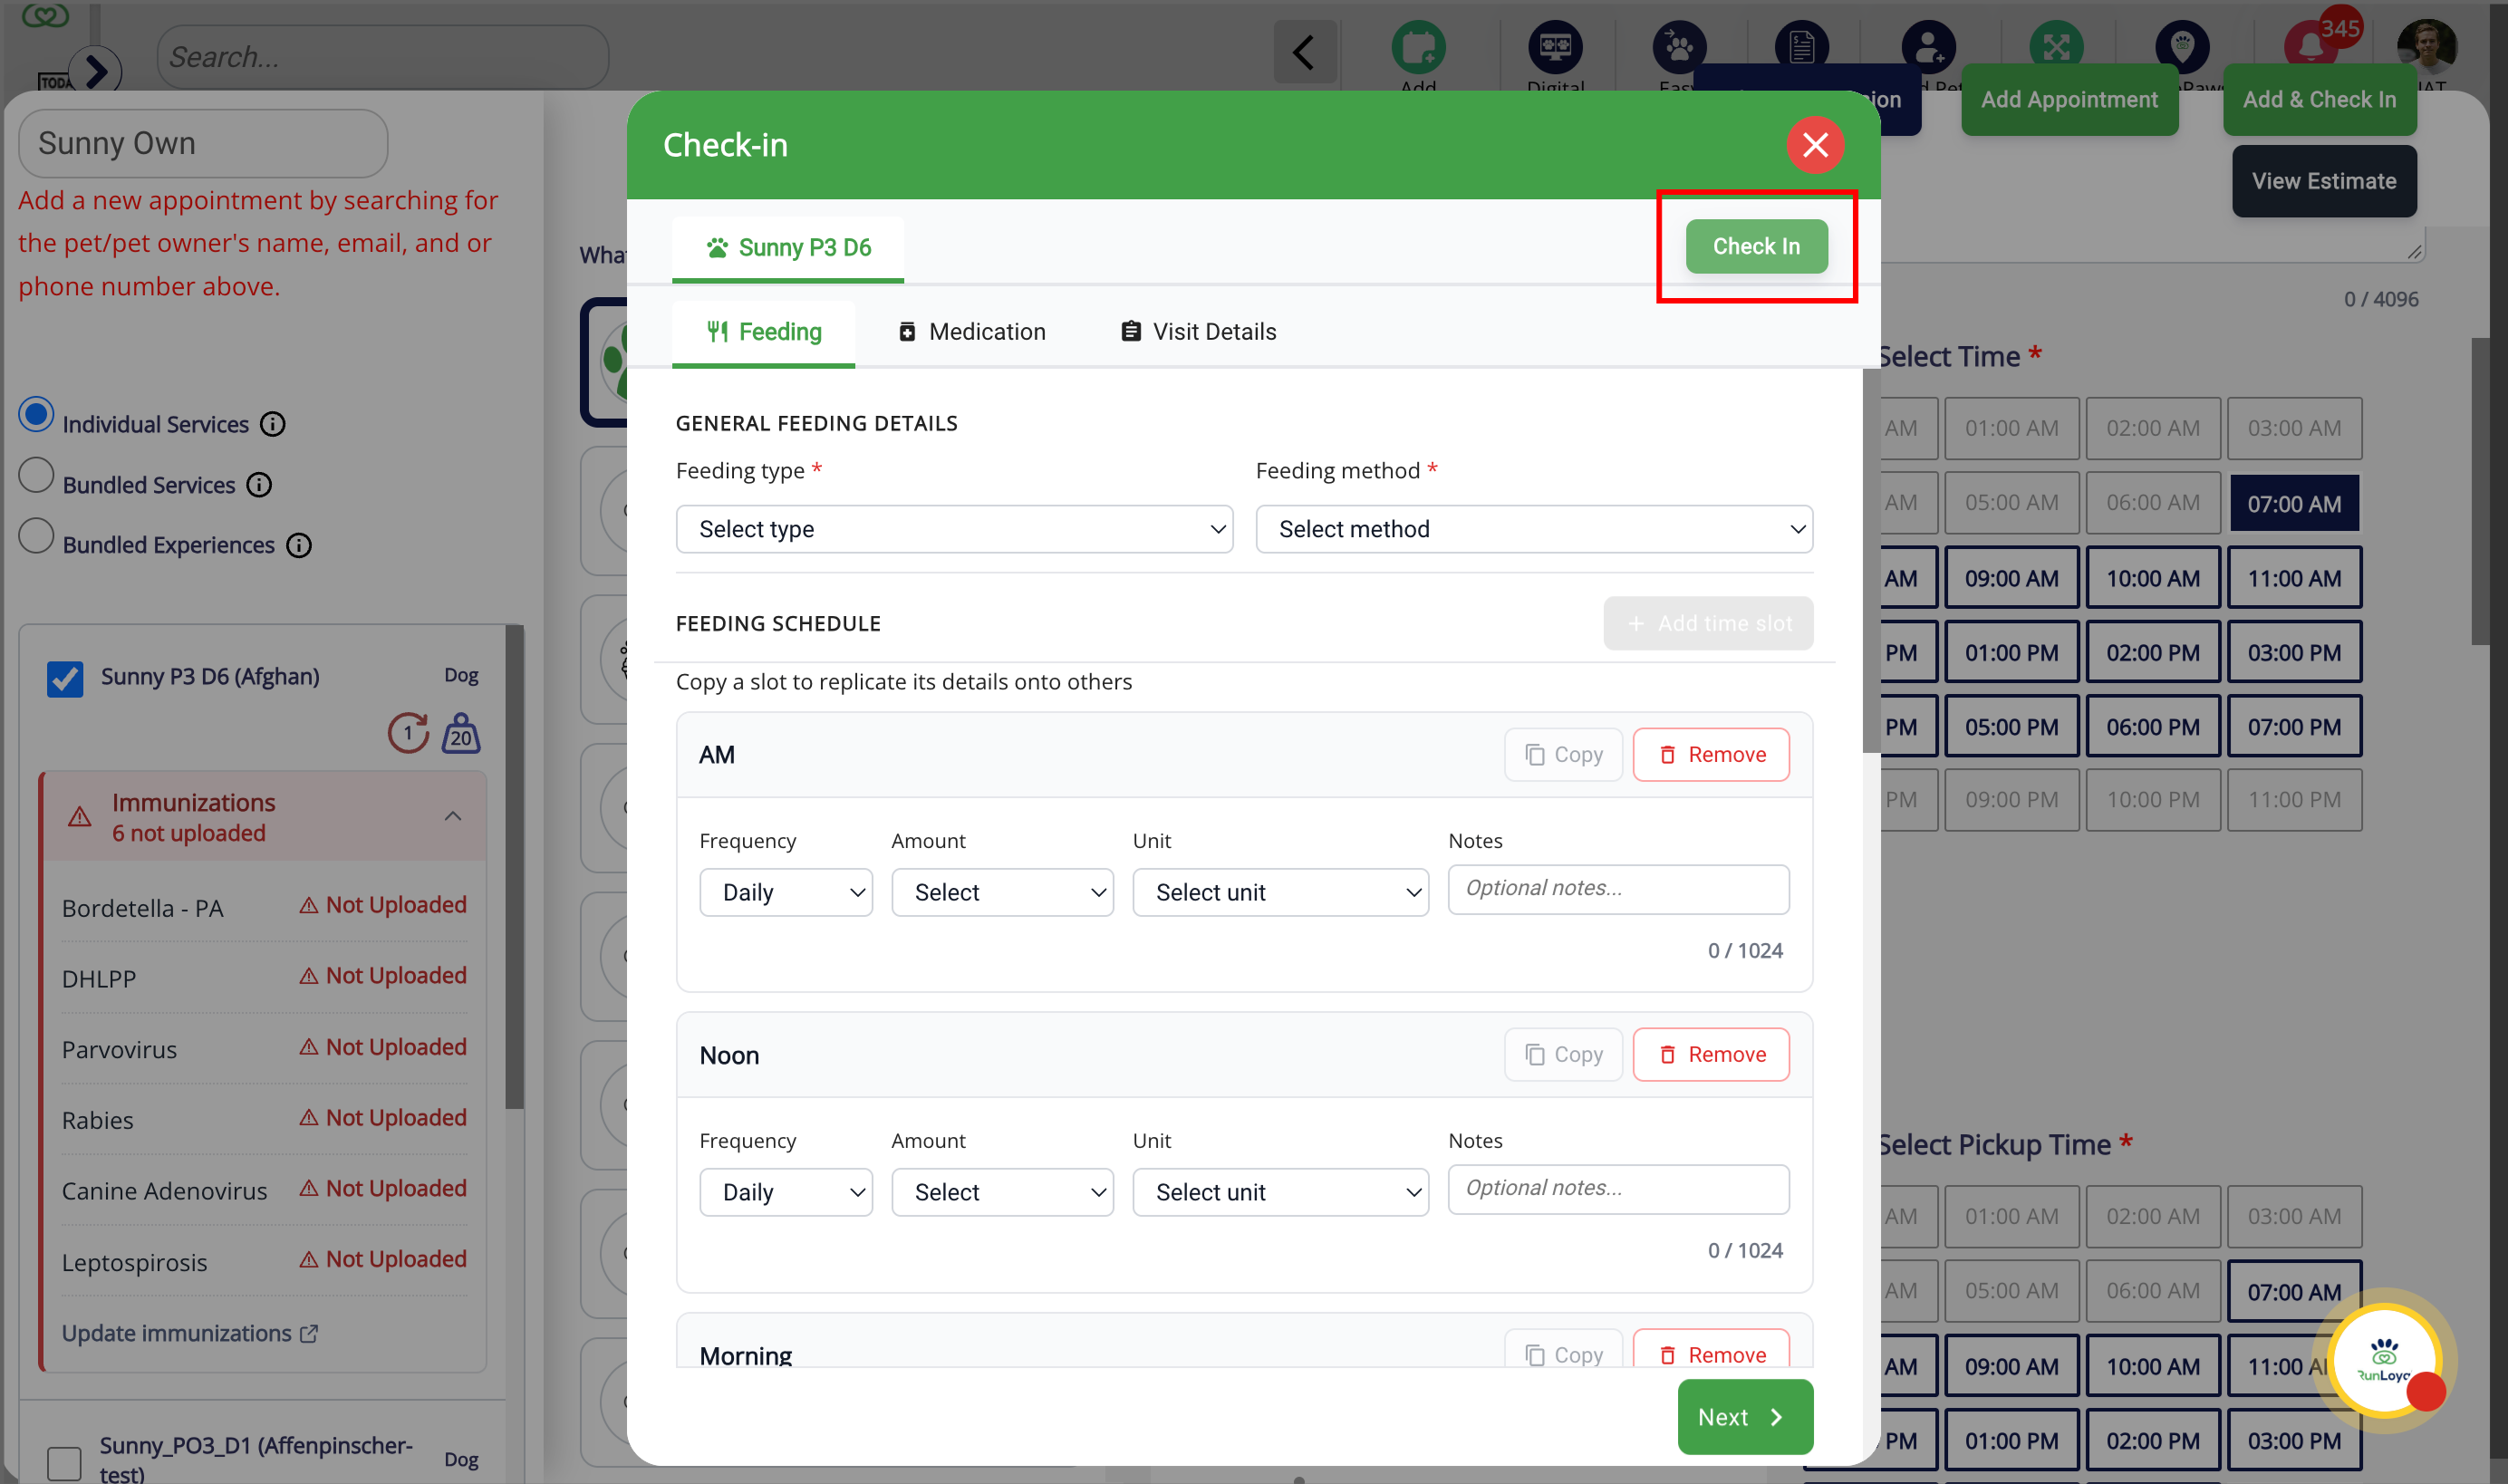
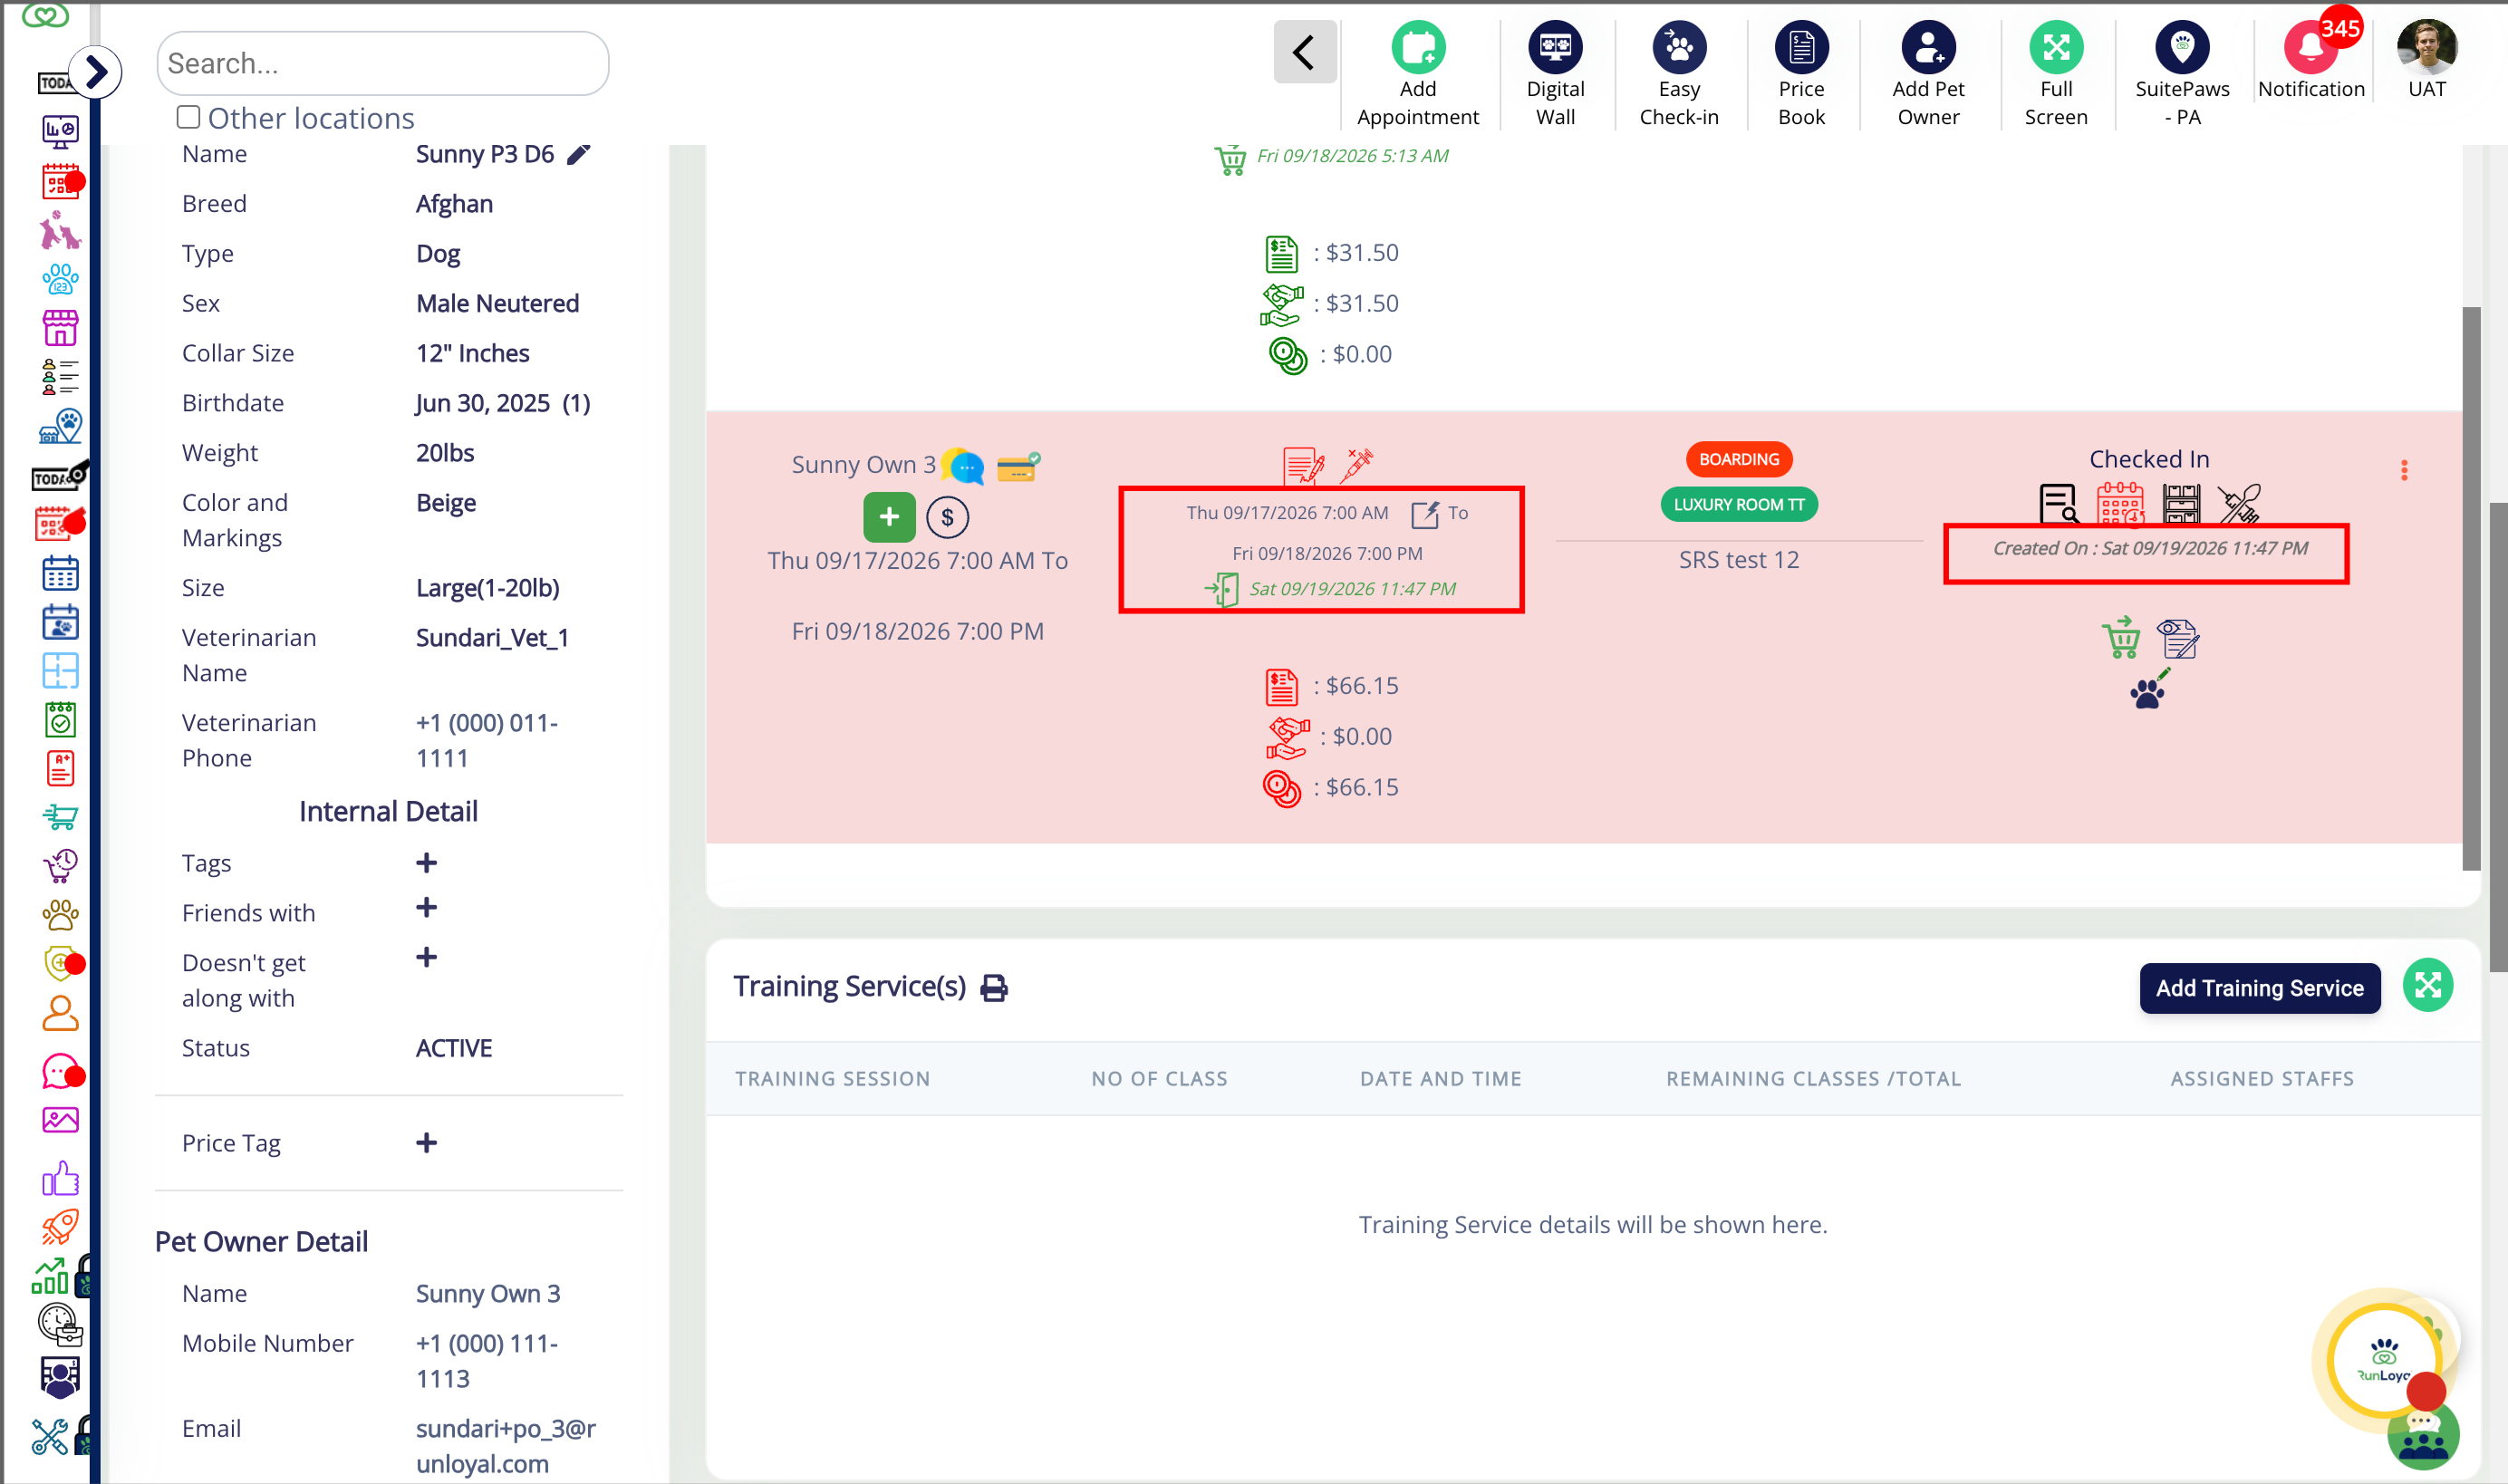
16. Past Appointment Success
More Information
For more information on creating and managing appointments, please refer to this article: Creating & Managing Appointments
Was this article helpful?
That’s Great!
Thank you for your feedback
Sorry! We couldn't be helpful
Thank you for your feedback
Feedback sent
We appreciate your effort and will try to fix the article