Overview
Scout AI Vax Verify is a new feature that uses AI to scan vaccination documents and extract key information and dates for each vaccine. This allows staff users to scan, verify, and manage pet vaccination records directly from the Portal, saving time and reducing manual review.. If any details are not captured as expected due to vaccine names that don’t fully match, staff users will be prompted to review and update the information manually. This article provides an overview of how Vax Verify works and how staff can use it to efficiently manage pet vaccination records.
Vax Verify can be viewed in the following areas:
- Left-hand navigation > Immunizations > Scout AI Vax Verify
- Pet Profile > Immunization Records section
- Pet Owner Mobile App > Animal Profile > Immunizations
TABLE OF CONTENTS
- Overview
- Using Vax Verify from the Immunizations page
- Adding Vax Verify to the Top Navigation Bar
- More Information
Using Vax Verify from the Immunizations page
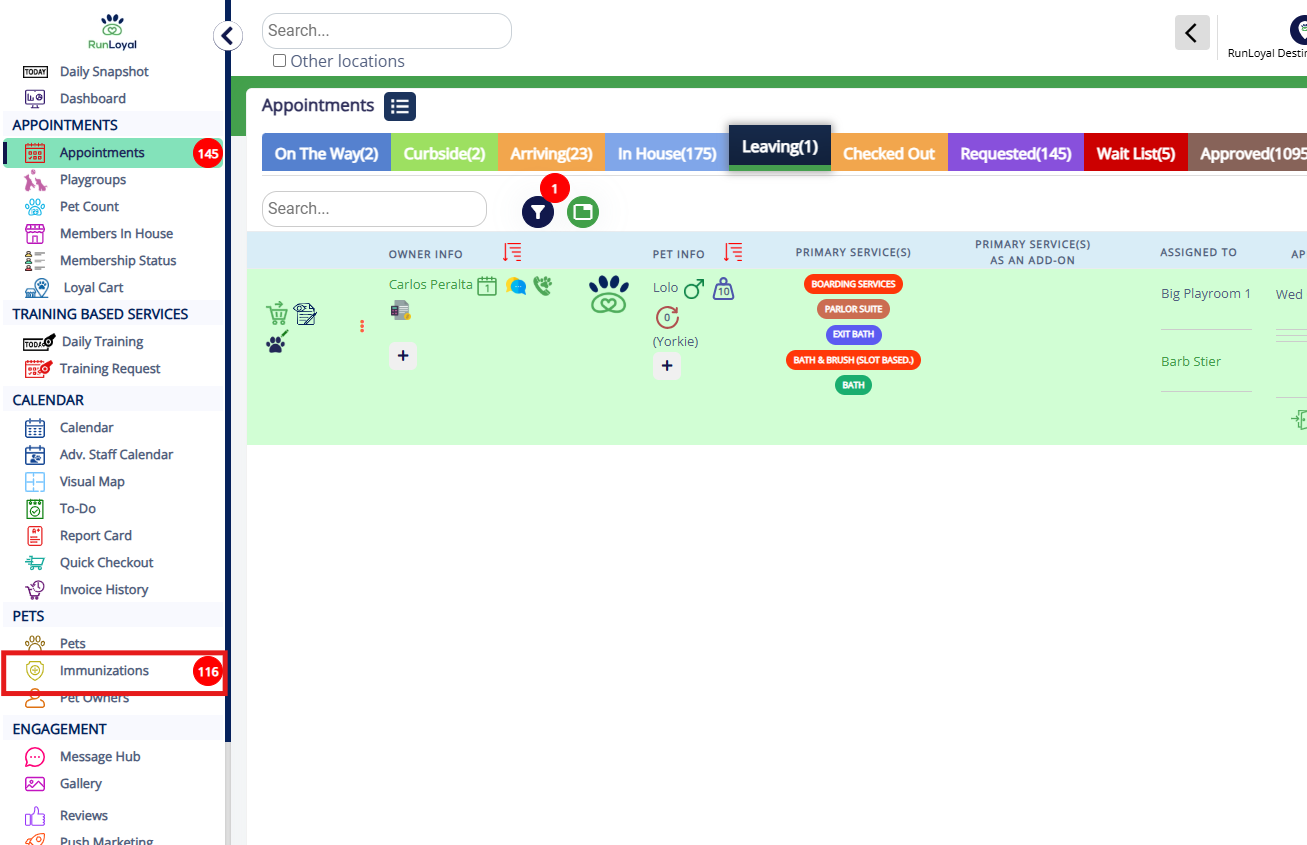
1. Navigate to Left-hand navigation > Immunizations.
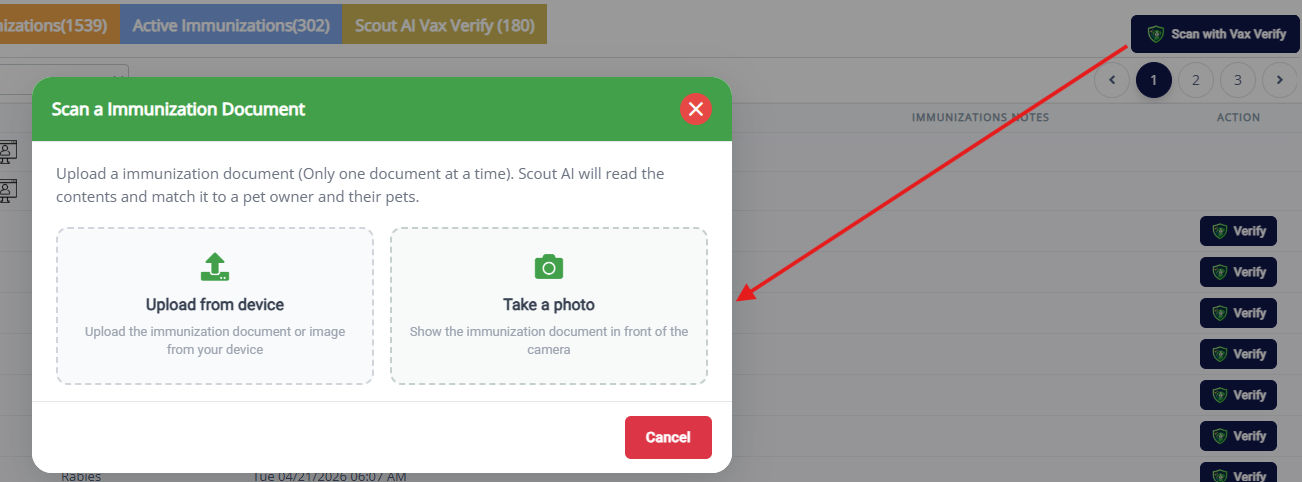
2. Click Scan with Vax Verify (blue button on top right of the page).

3. Upload or Take a photo from your device to capture the vaccine document. Once the document is uploaded, Scout AI automatically analyzes the vaccination record, identifies the vaccination types and corresponding expiry dates, and extracts the relevant information from the document.
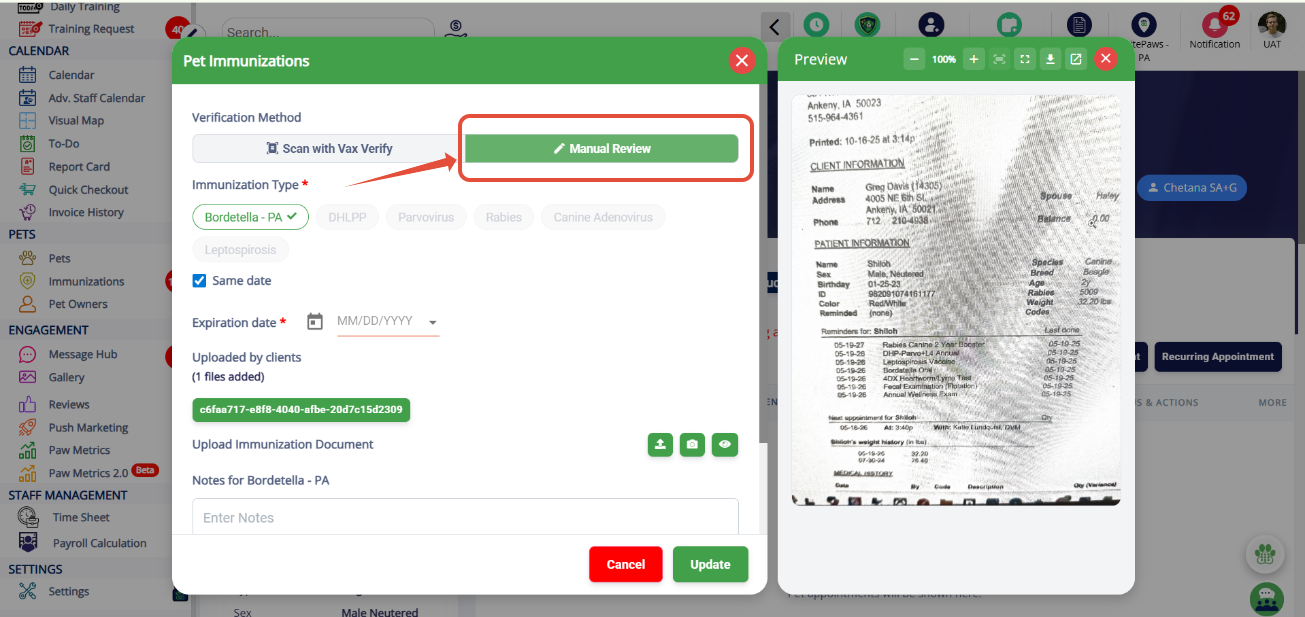
4. Users have the option to select or deselect specific immunization types identified during the scan, verify that the correct pet owner and pet have been matched, and confirm the extracted vaccination details. A side-by-side preview of the uploaded document remains visible throughout the review process, allowing staff to easily compare the scanned information with the original record. Once verified, click Apply Records to update the pet's vaccination data in the system.
5. For situations where additional verification is required, staff can switch to Manual Review mode. This option allows users to manually enter or modify immunization types and expiry dates before applying the records, providing full control over the vaccination information being added to the pet profile.
Adding Vax Verify to the Top Navigation Bar
1. To add the Vex Verify icon to the Top Navigation Bar so you can easily upload immunization documents, navigate to Settings > Operations > Personalization.
2. Under Business Portal, find the setting called Customizable Top Quick Actions, enable this setting, and click the Edit Buttons icon.
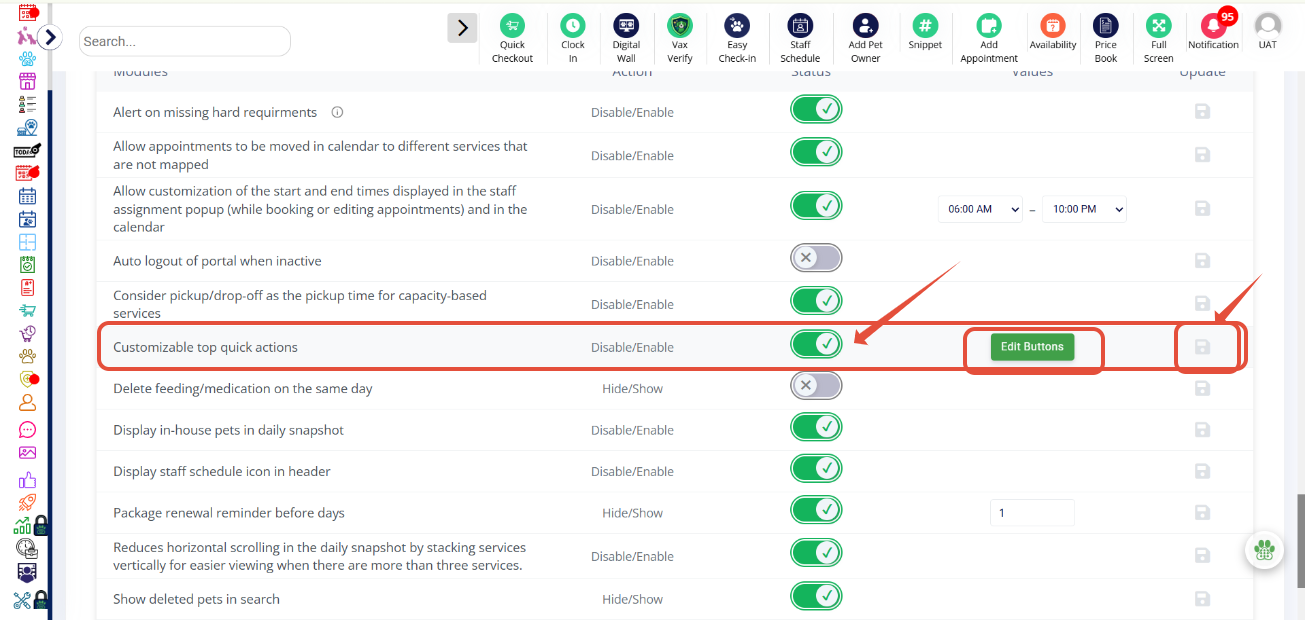
3. From there, you can enable or disable the Vax Verify quick action based on your preferences.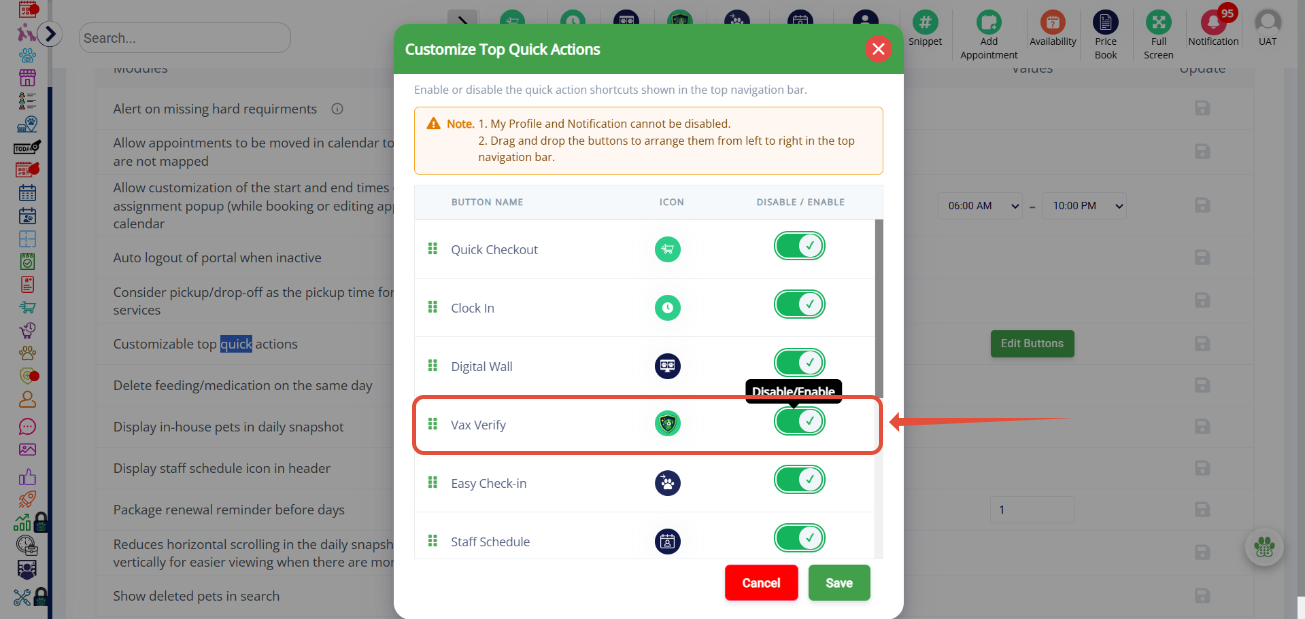
More Information
For more information on how your customers can upload documents with Vax Verify, please refer to this article: ScoutAI Vax Verify in Business Portal
For more information on manually validating immunizations, please refer to this article: Validating Immunizations
Was this article helpful?
That’s Great!
Thank you for your feedback
Sorry! We couldn't be helpful
Thank you for your feedback
Feedback sent
We appreciate your effort and will try to fix the article